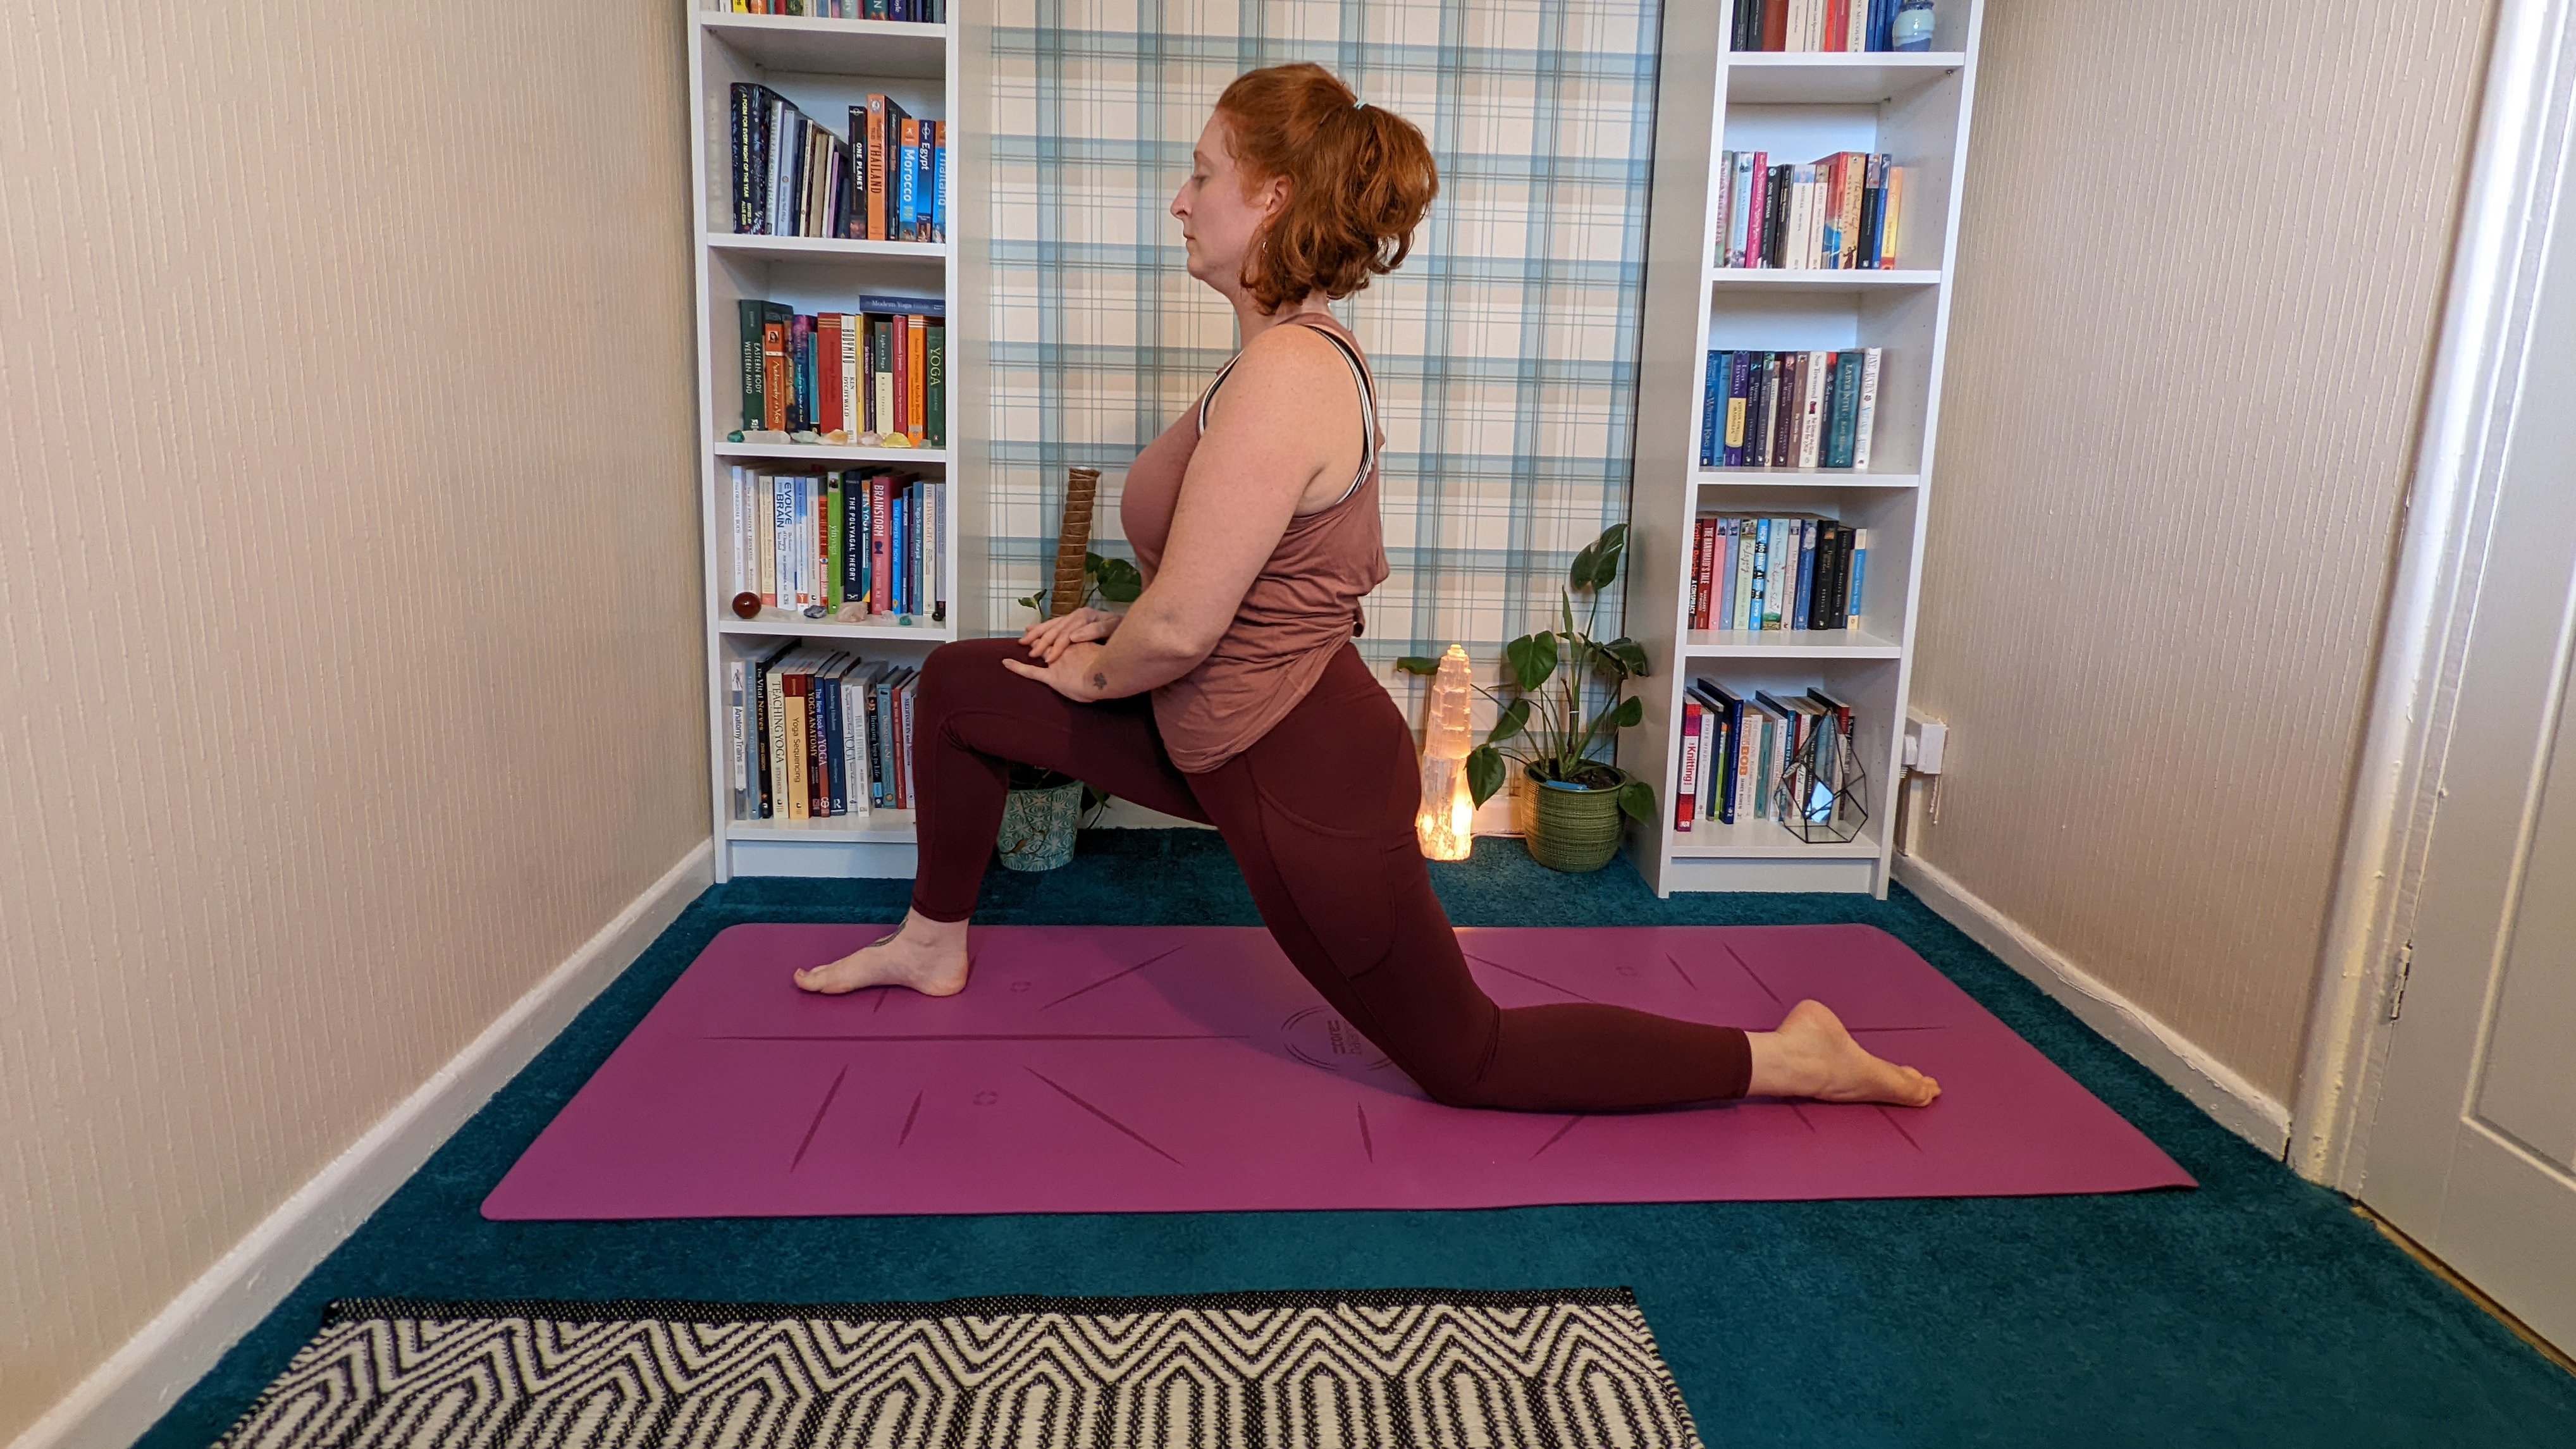
Keeping our hips mobile is important as we get older, which is where hip mobility yoga can come in handy. As our lives become increasingly more sedentary, many of us are spending hours each day sitting down, causing the hip muscles to take on a shortened position that can trigger aches and pains — which isn’t great when you consider that lower body mobility is essential for ensuring we are able to walk, sit and stand easily.
Our hips are involved in lots of different movements in our day to day life. When we sit down on the sofa and get back up, we use the muscles of the lower body to do so (especially if we aren’t relying on the arm of the chair to help us). The more we use, stretch and strengthen the muscles of and around the hips, the better our mobility will be. It’s the old adage of ‘use it or lose it’. Thankfully, there is a solution.
The postures and hip stretches in this hip mobility yoga flow will help loosen and strengthen the muscles of the hips, lower back, glutes, groin and inner thighs. We’ll also be targeting the connective tissues helping to oil the hip joint itself. We recommend that you practice this yoga flow on one of the best yoga mats as this will make it easier to maintain your balance and avoid slipping.
If you enjoy the below hip mobility yoga flow and are looking for more tips on your practice, take a look at our guide to anti-aging yoga moves. You might also like to try out this wrist-free yoga flow if you suffer with joint pain.
Circle the hips
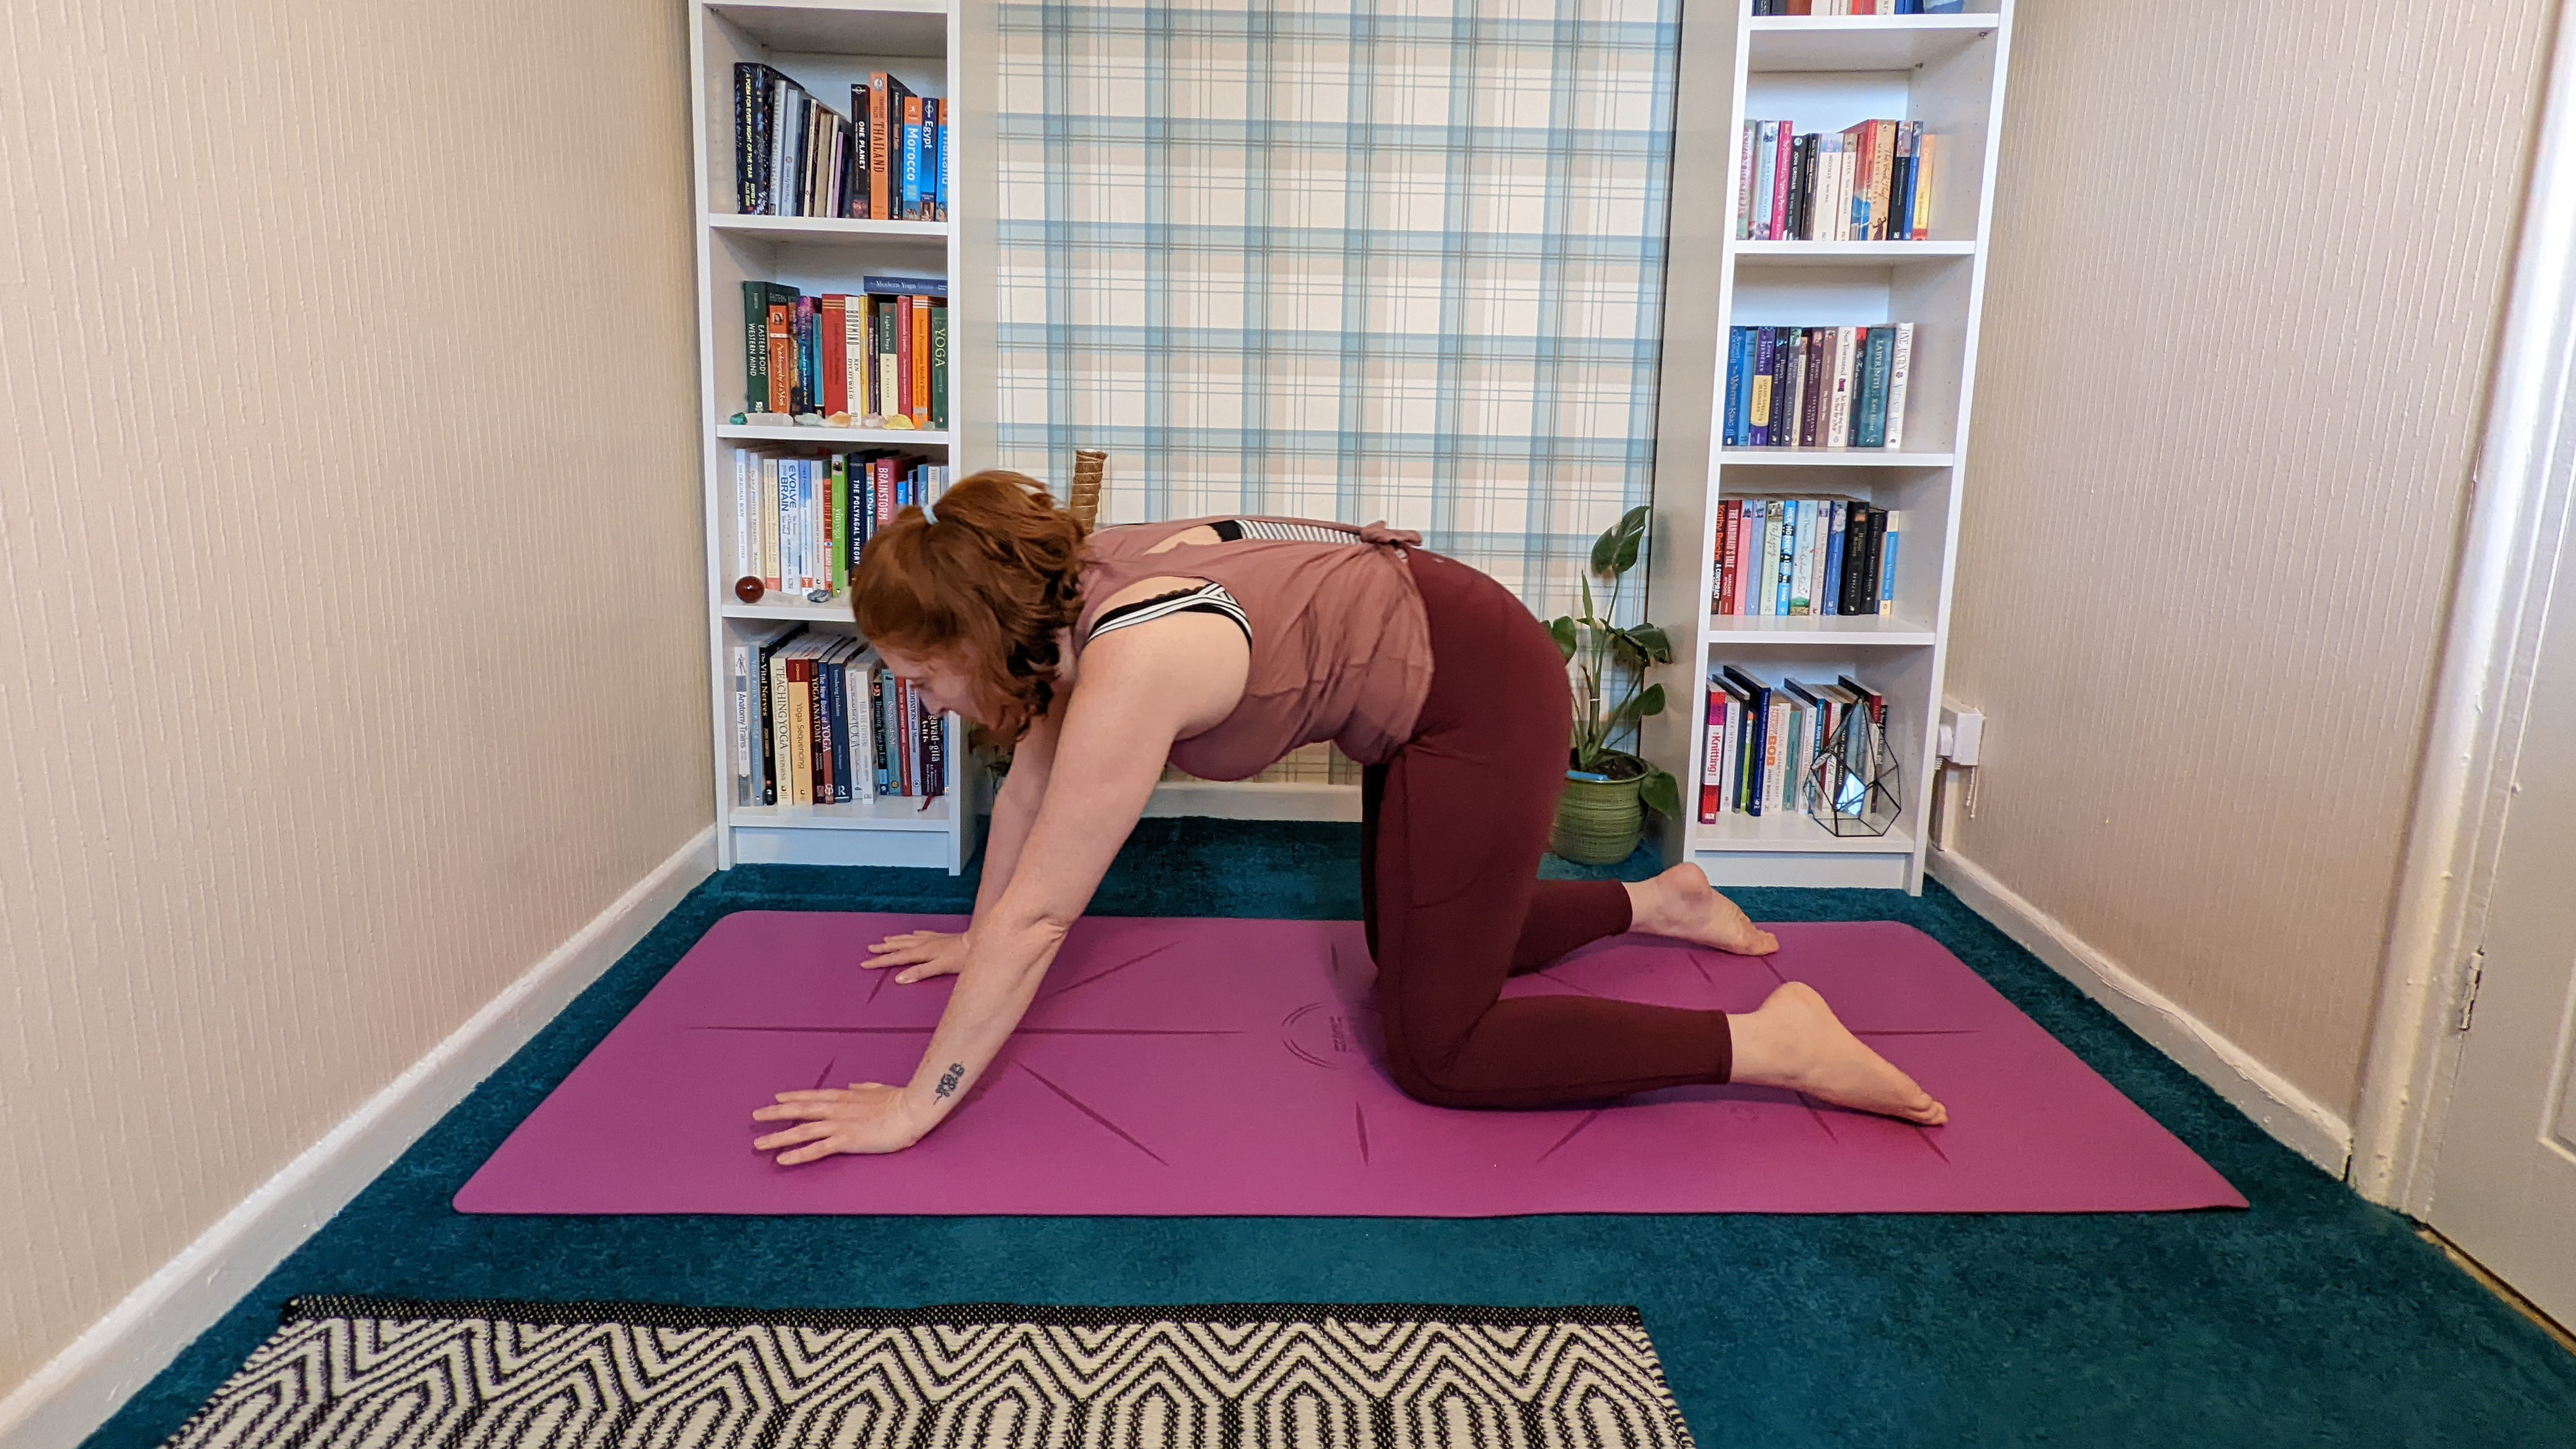
Step 1: Bring yourself into an all fours position, stacking your wrists under your shoulders and knees under the hips.
Step 2: Breathing steady, deep breaths begin to circle your hips around your knees taking the weight forward into the hands and back into the legs as you do so.
Step 3: Allow your spine to become involved in the movement so you feel a side stretch.
Start your week with achievable workout ideas, health tips and wellbeing advice in your inbox.
Step 4: Imagine you are drawing circles on the floor with your hip bones. Spend a minute circling the hips in one direction before changing, circling the other way.
This movement is great for warming up the glutes, lower back, spine and hips. It’s an action that helps loosen tight muscles in the lower body, oils the hip joints and prepares you for deeper hip stretches.
Knee raises
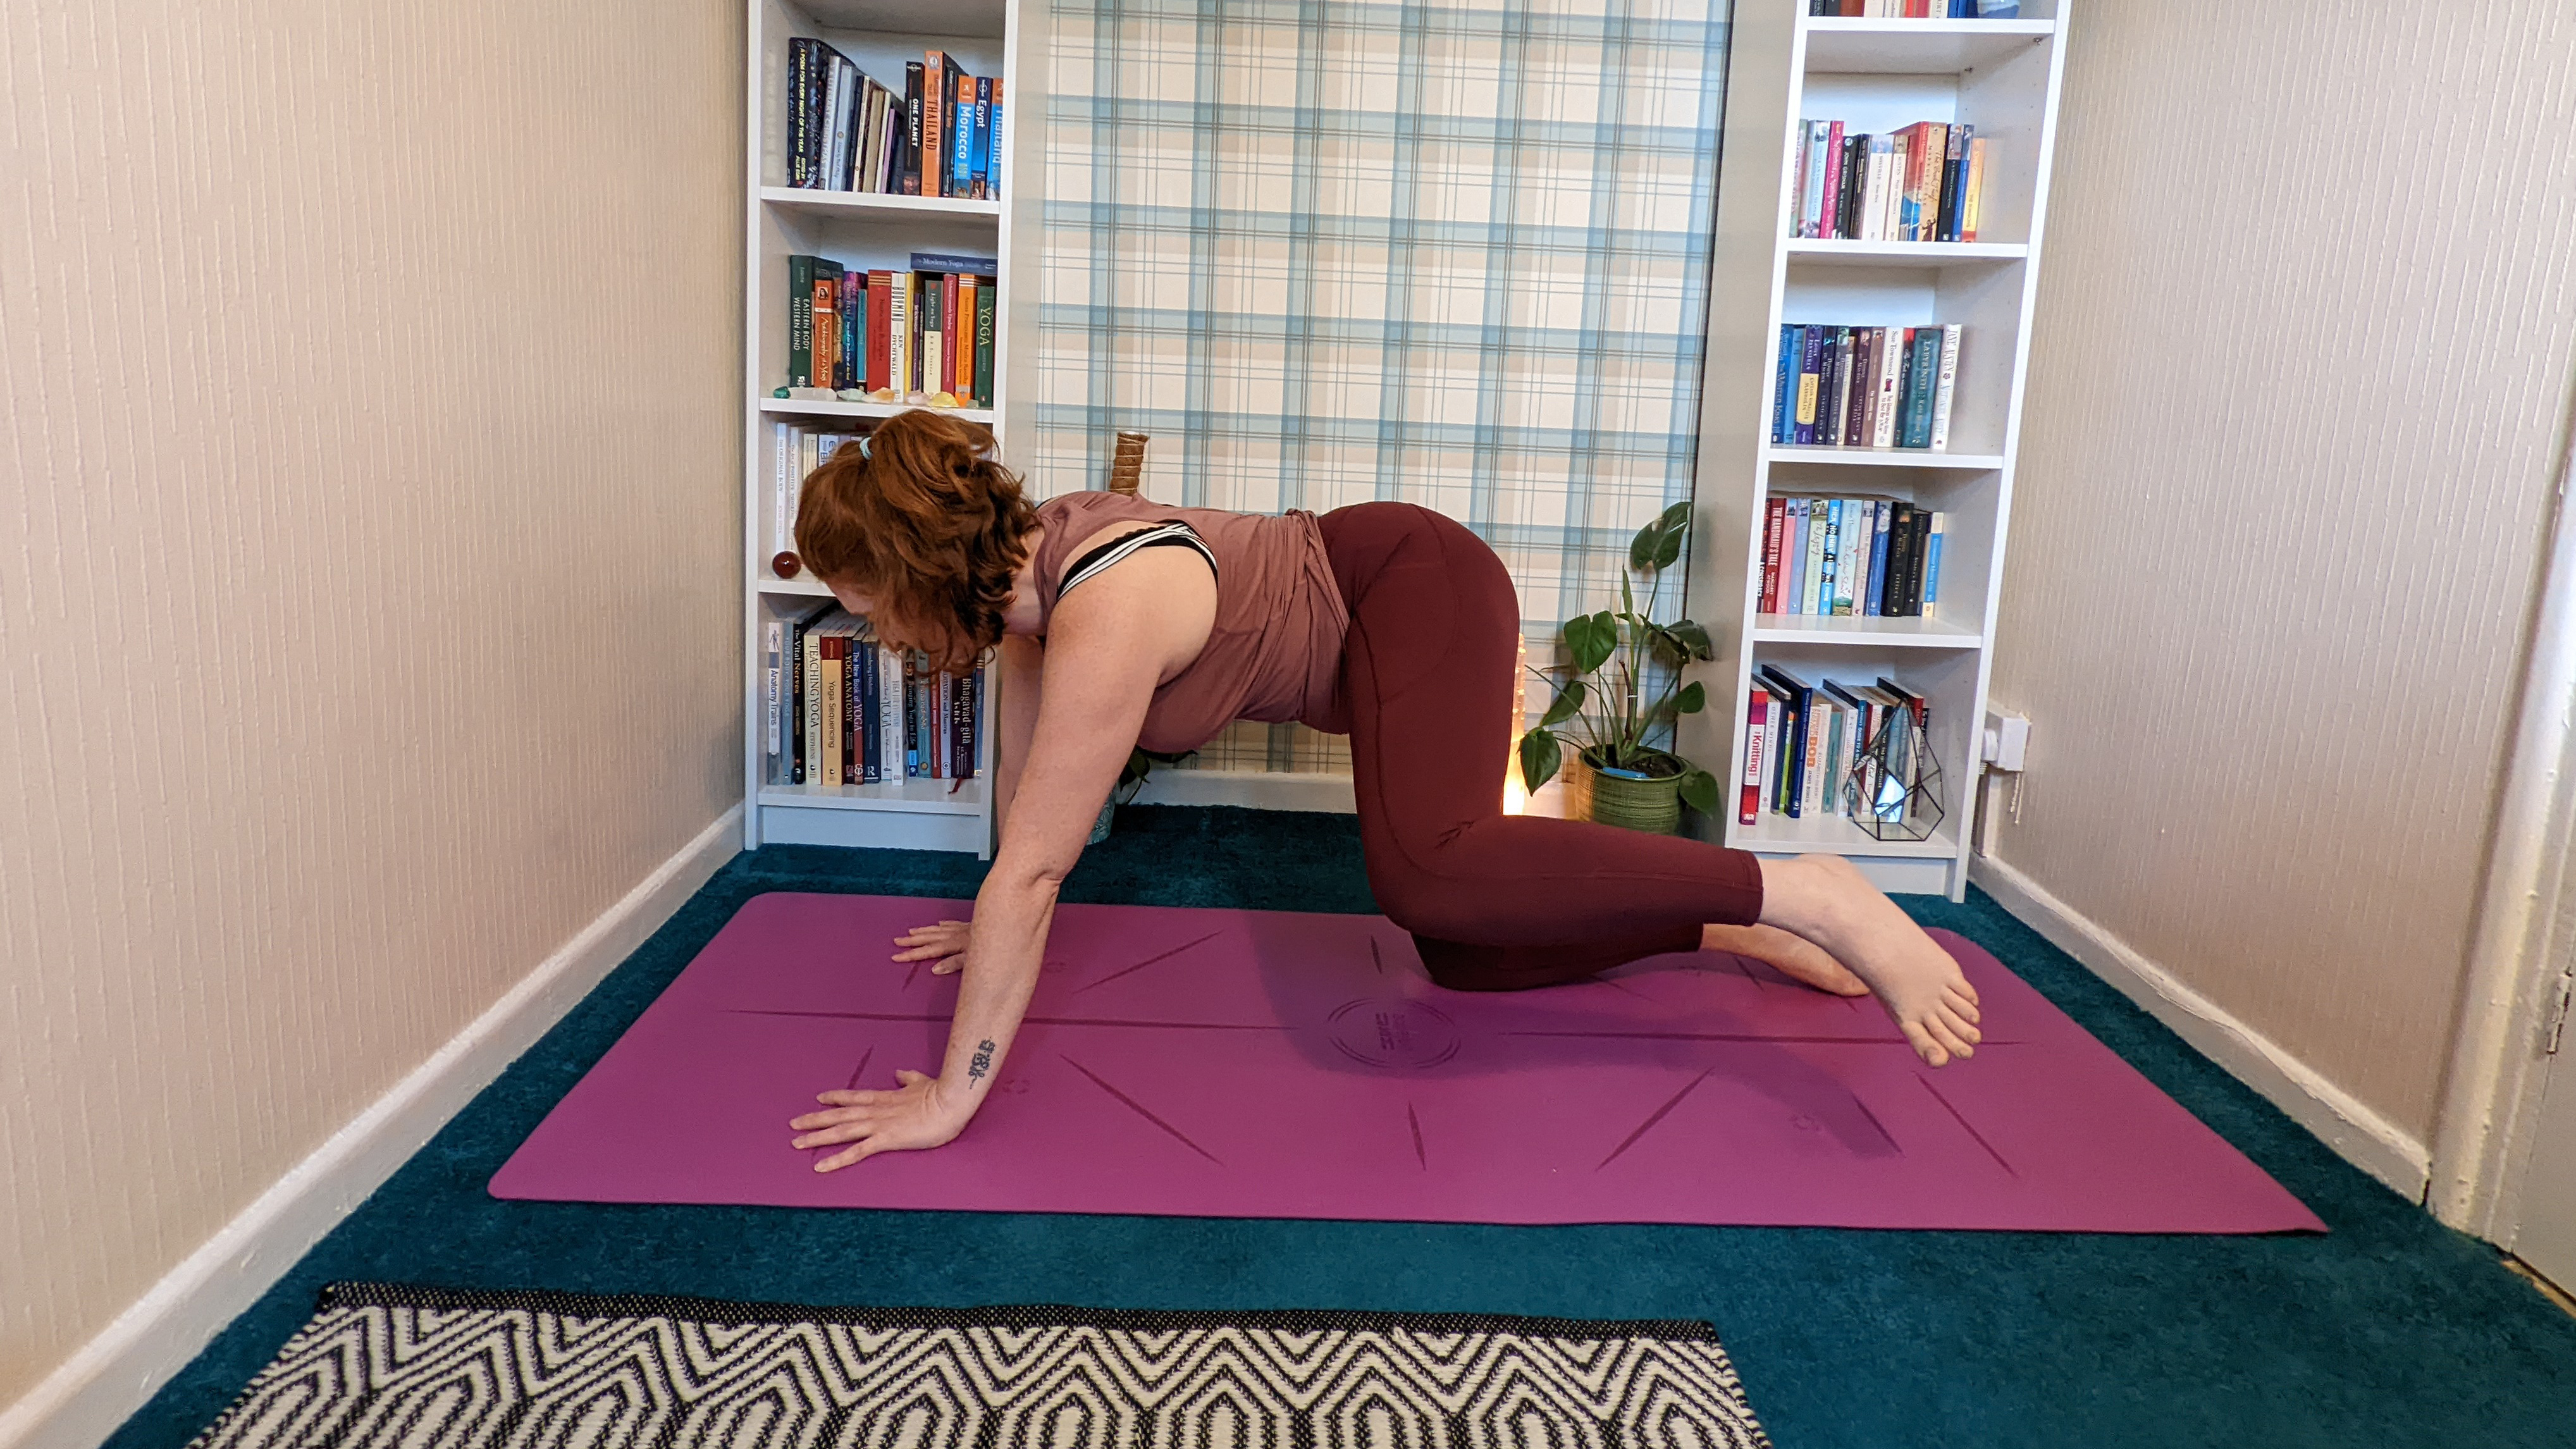
Step 1: Staying on all fours, begin to lift your right knee up and out to the side.
Step 2: Lean your weight into the left hand and knee, keeping your elbows straight.
Step 3: Bring the knee back to the floor and repeat this movement 4 times.
Step 4: Change legs, lifting your left knee up.
These knee raises are a wonderful way to see how much mobility you have in your hips. They activate the muscles around the hips, groin and inner thighs helping you to build strength and increase your hip mobility. If you struggle with knee pain, take a look at our guide to how to do yoga with bad knees.
Lunges
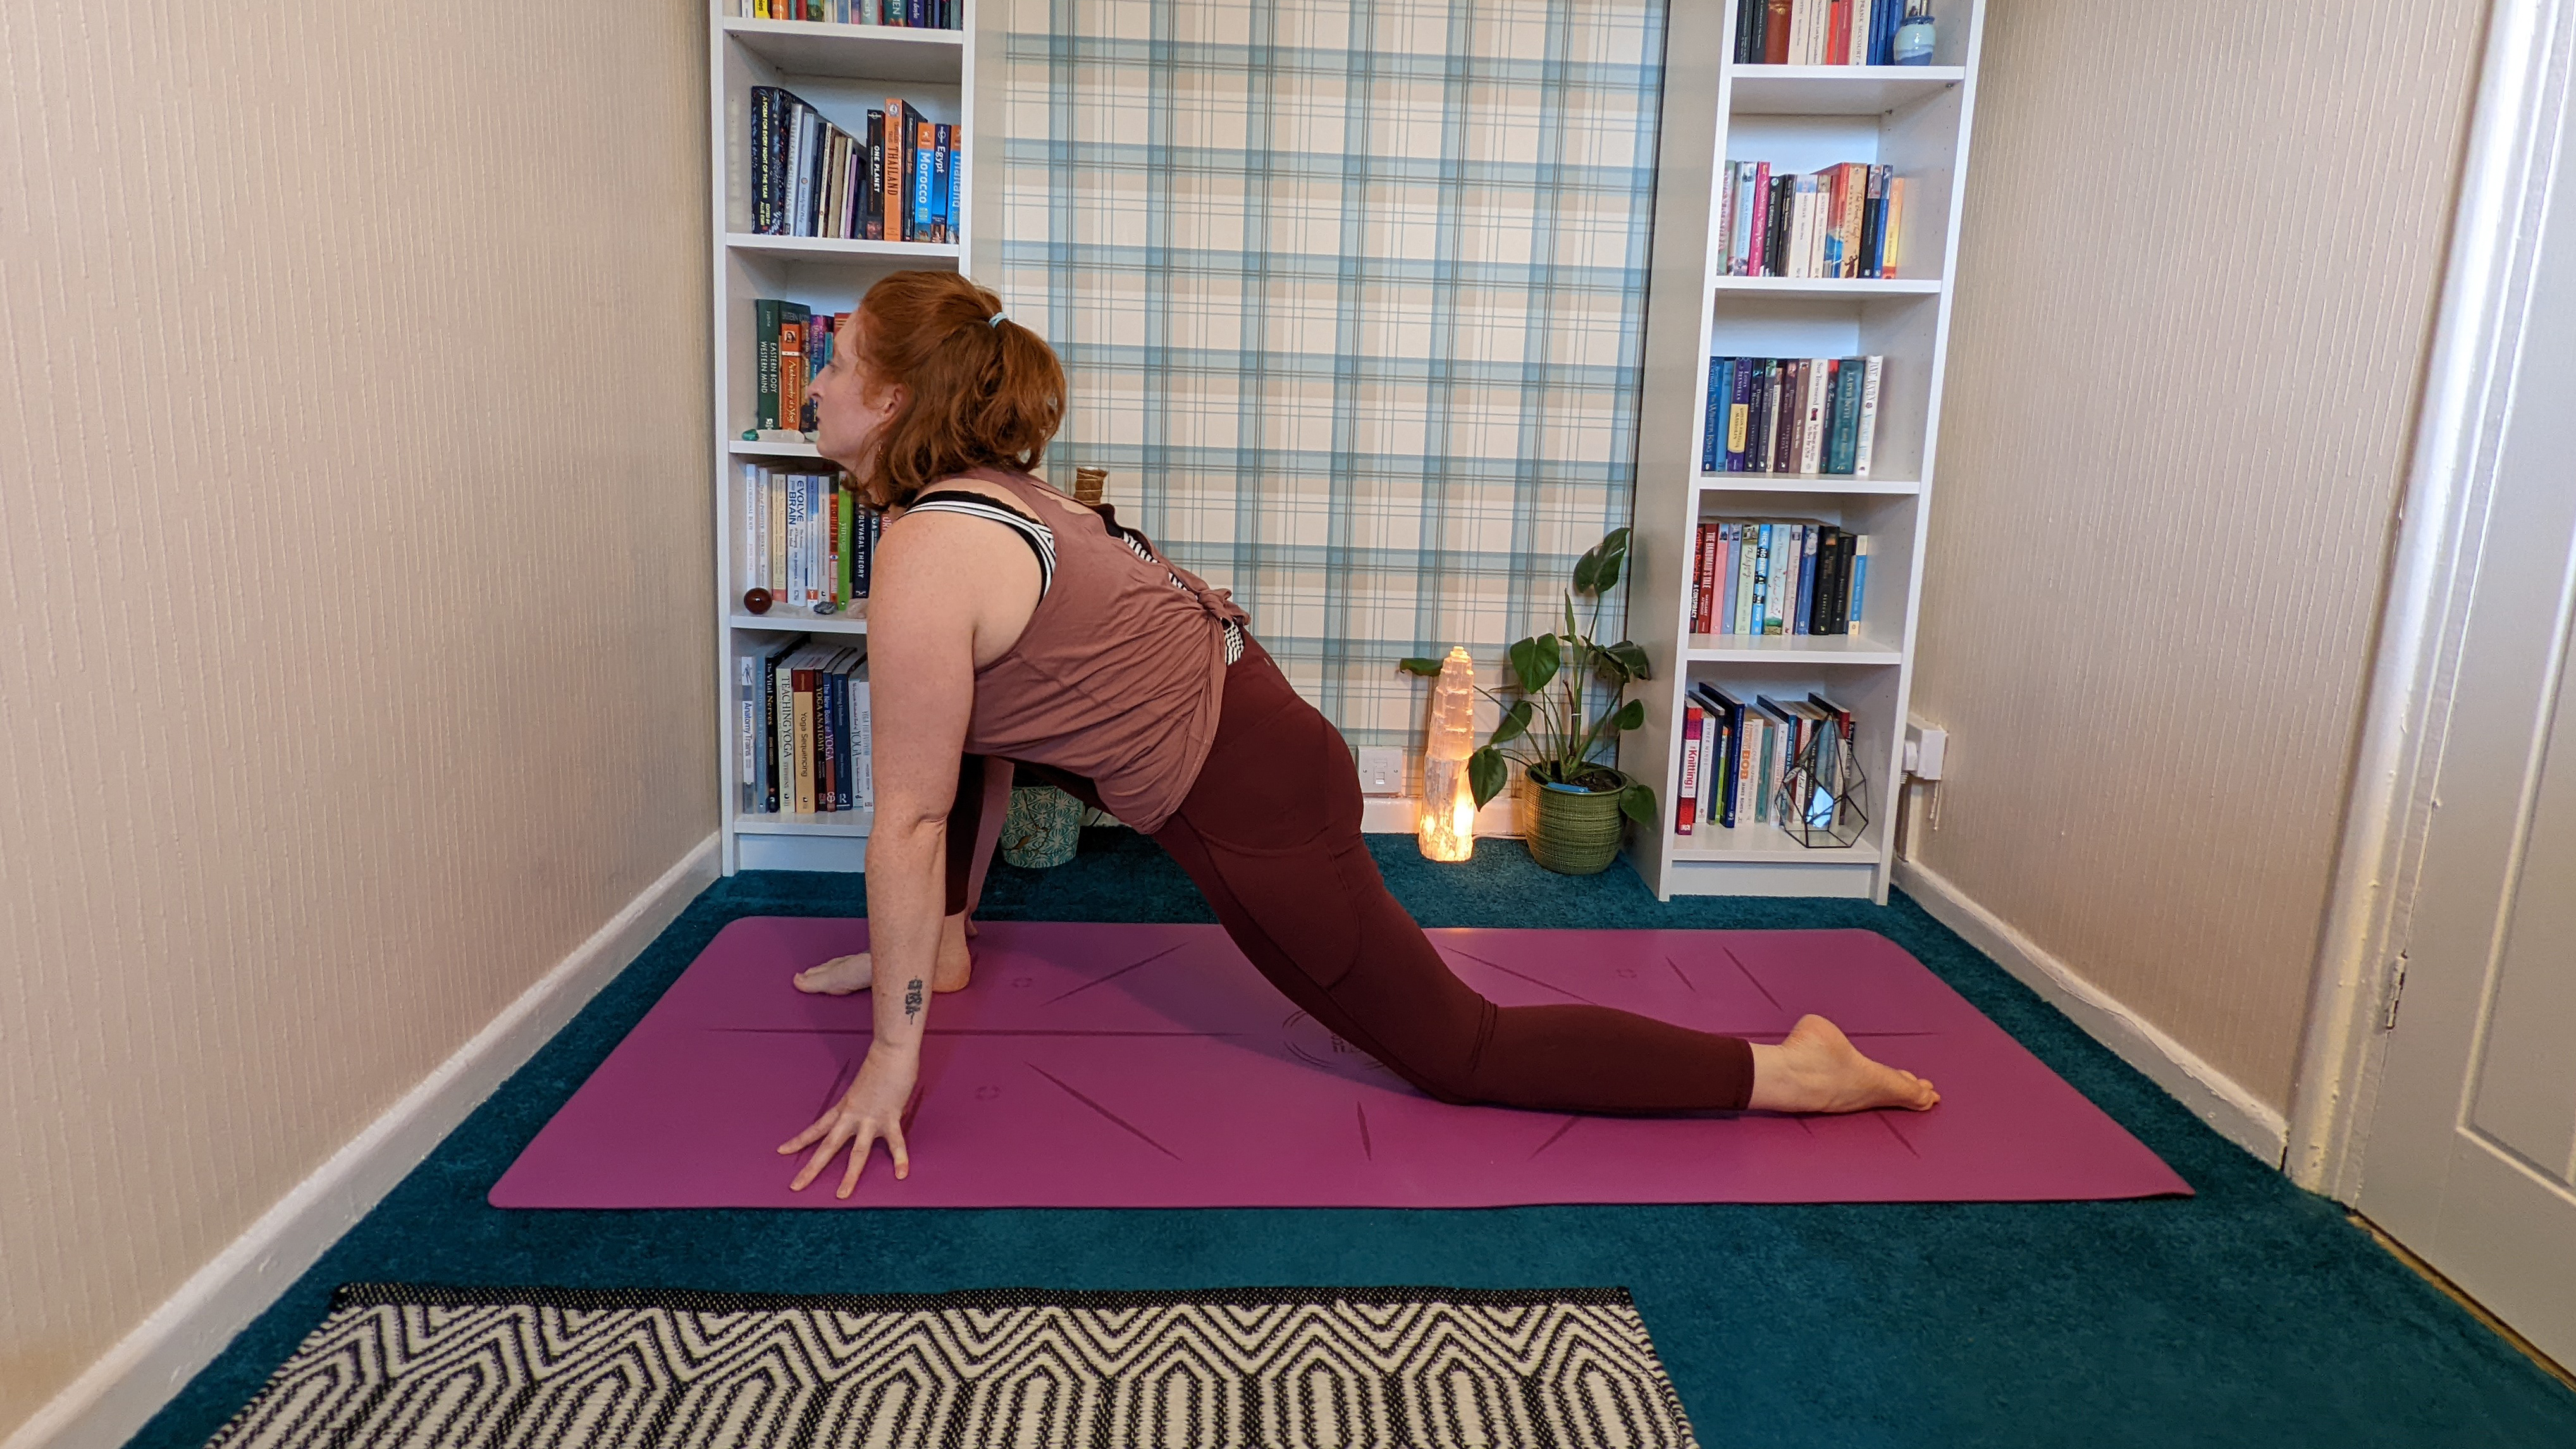
Step 1: From all fours, step your right foot forward, stacking the knee above the ankle.
Step 2: Stretch your left leg back and point your toes to the back of your mat.
Step 3: Place your hands either side of your front foot. If you struggle to reach the floor, try placing your hands onto your right thigh instead.
Step 4: Take 5 deep breaths here, gently lowering your hips forward and down on each exhale.
Step 5: Keep pressing into your front foot to create resistance to improve your mobility — keep the lunge active. Remember to change sides and repeat with the left foot forward.
One of the (many) benefits of lunges are that they allow the hip flexors and thighs to open gradually. If you keep your leg muscles and glutes active while holding them, they are superb for increasing your hip mobility and strengthening the lower body.
Lunge twist
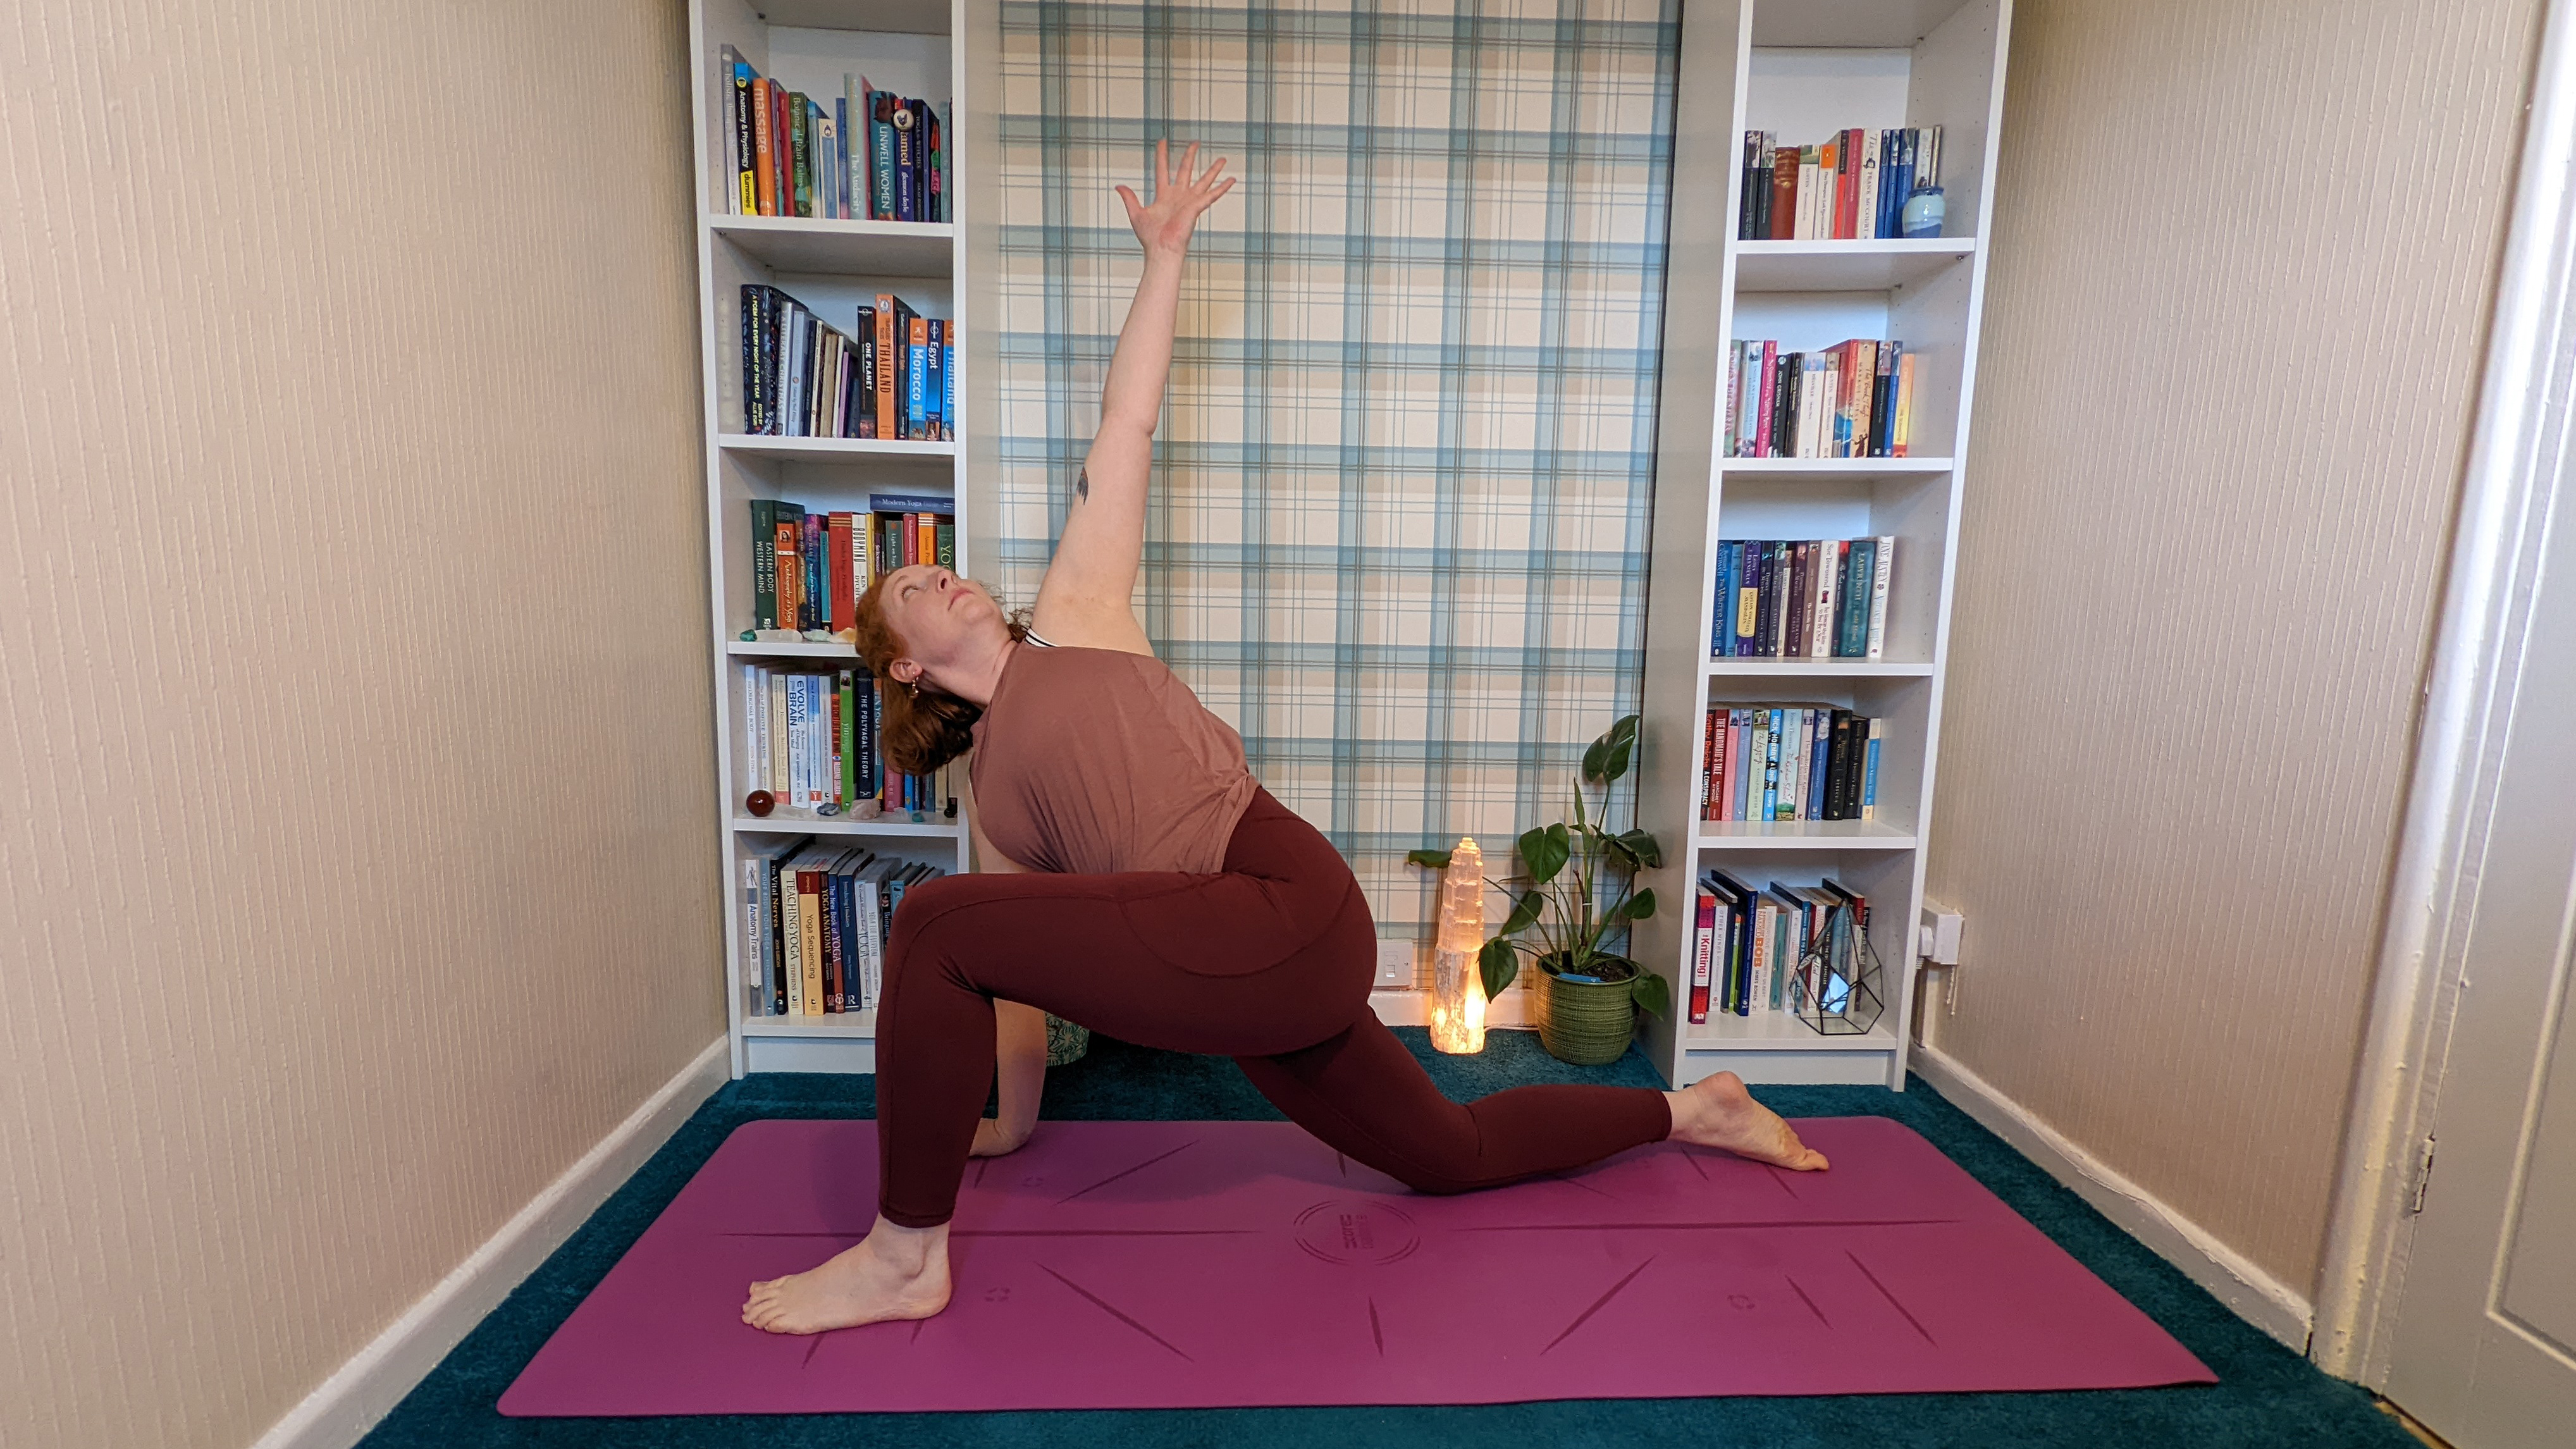
Step 1: With your left foot forward in your lunge, bring your right hand down to the floor next to your left foot. If you can’t reach the floor, place your right hand onto a book or yoga block instead.
Step 2: On an inhale, bring your left arm up behind you and exhale, twist and open to the left.
Step 3: Take 3 deep breaths here and then change sides.
Not only do you get the benefit of the lunge releasing tight hips and thighs, adding in a twist opens the lower abdomen, psoas (a deep muscle that joins the torso to the legs) and lower back. If we are holding tension in these areas it can cause reduced mobility of the hips.
Psoas stretch
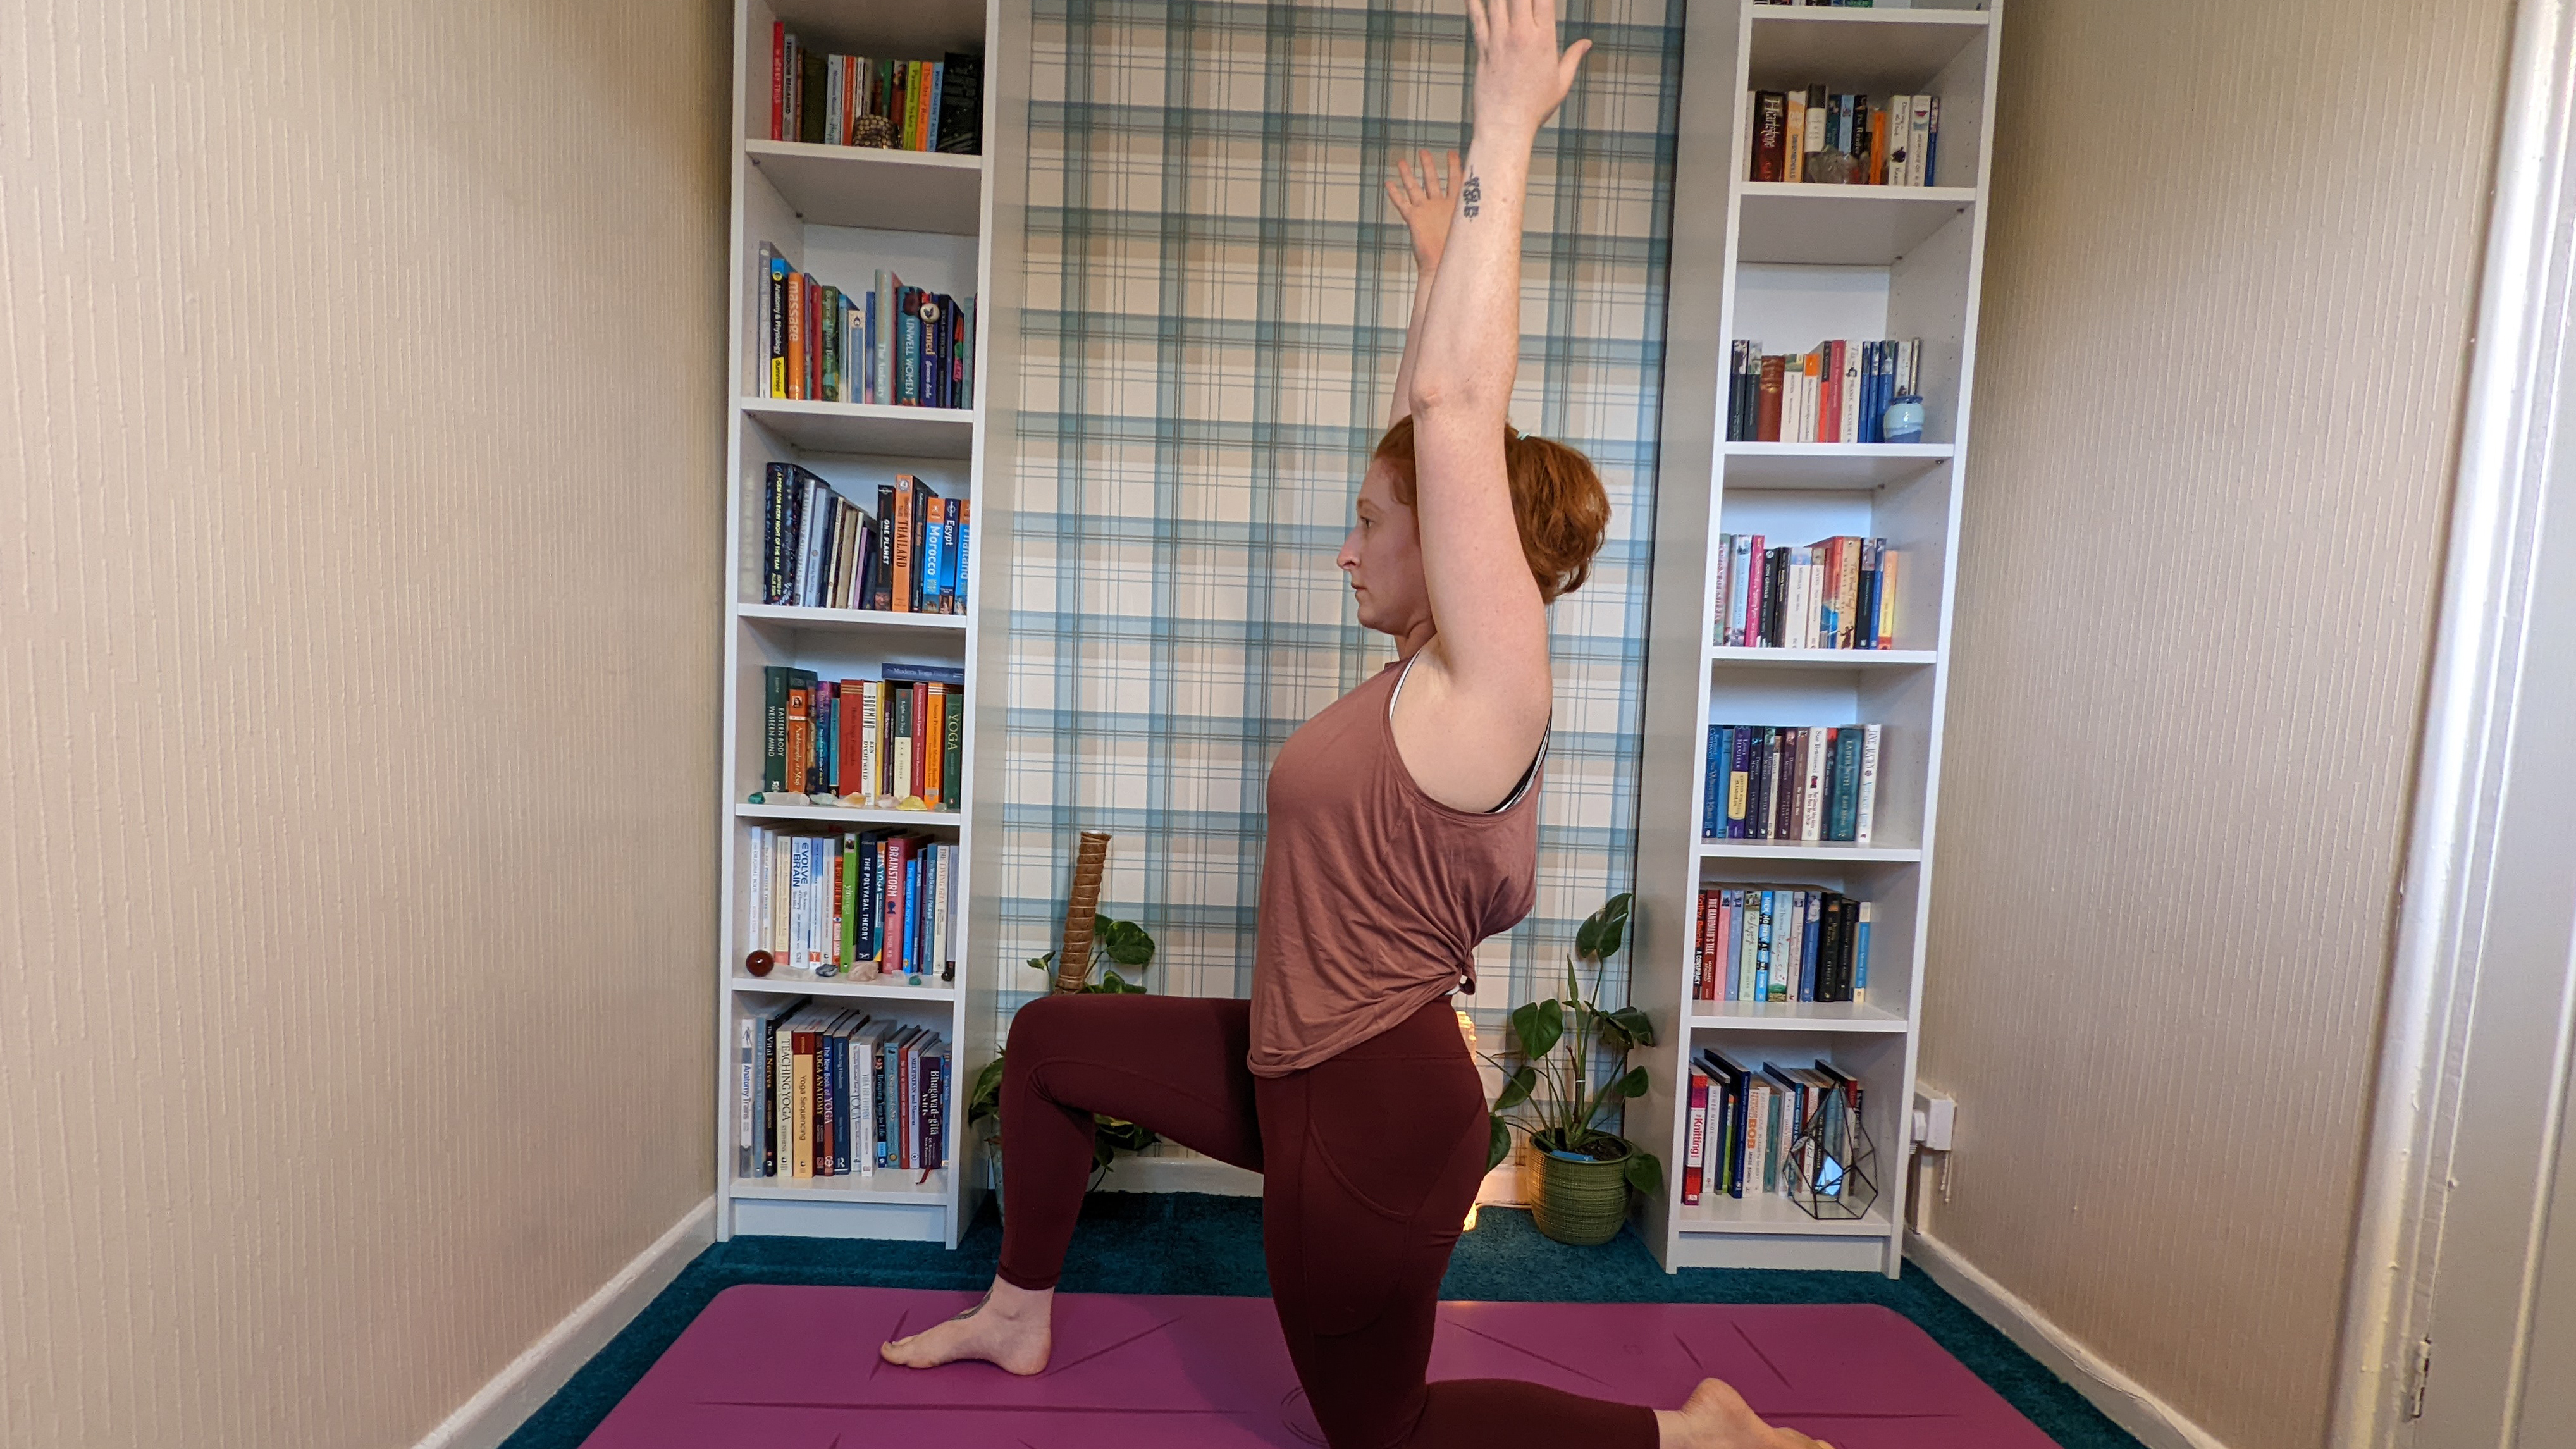
We’ll go a little deeper into opening the psoas here. The psoas is the only muscle that connects your spine to your legs. If this is tight, it can cause a lack of movement in the lower body, including in and around the hips.
Step 1: From your lunge twist, you should now have your right foot forward. Stack your right knee over your right ankle.
Step 2: Bring your left knee forwards so your left hip stacks over the left knee. Your legs should form a square shape with your mat.
Step 3: Inhale and lift your arms up next to your shoulders, keeping your spine straight. Reach through the fingers.
Step 4: To deepen this psoas stretch, tuck your tailbone, shifting your buttocks down towards your back knee.
Step 5: Stay for 5 deep breaths before changing sides.
By targeting the psoas, we can work with the deeper muscles of the hips helping us to move with more ease. As these muscles are situated deep within the body, they can be difficult to access but when we do, it can help our mobility as the psoas is the only muscle that joins our upper and lower body together. Therefore, a tight psoas has an effect on how we walk and move. Find out why the hip flexors are key to healthy ageing.
Cow face pose
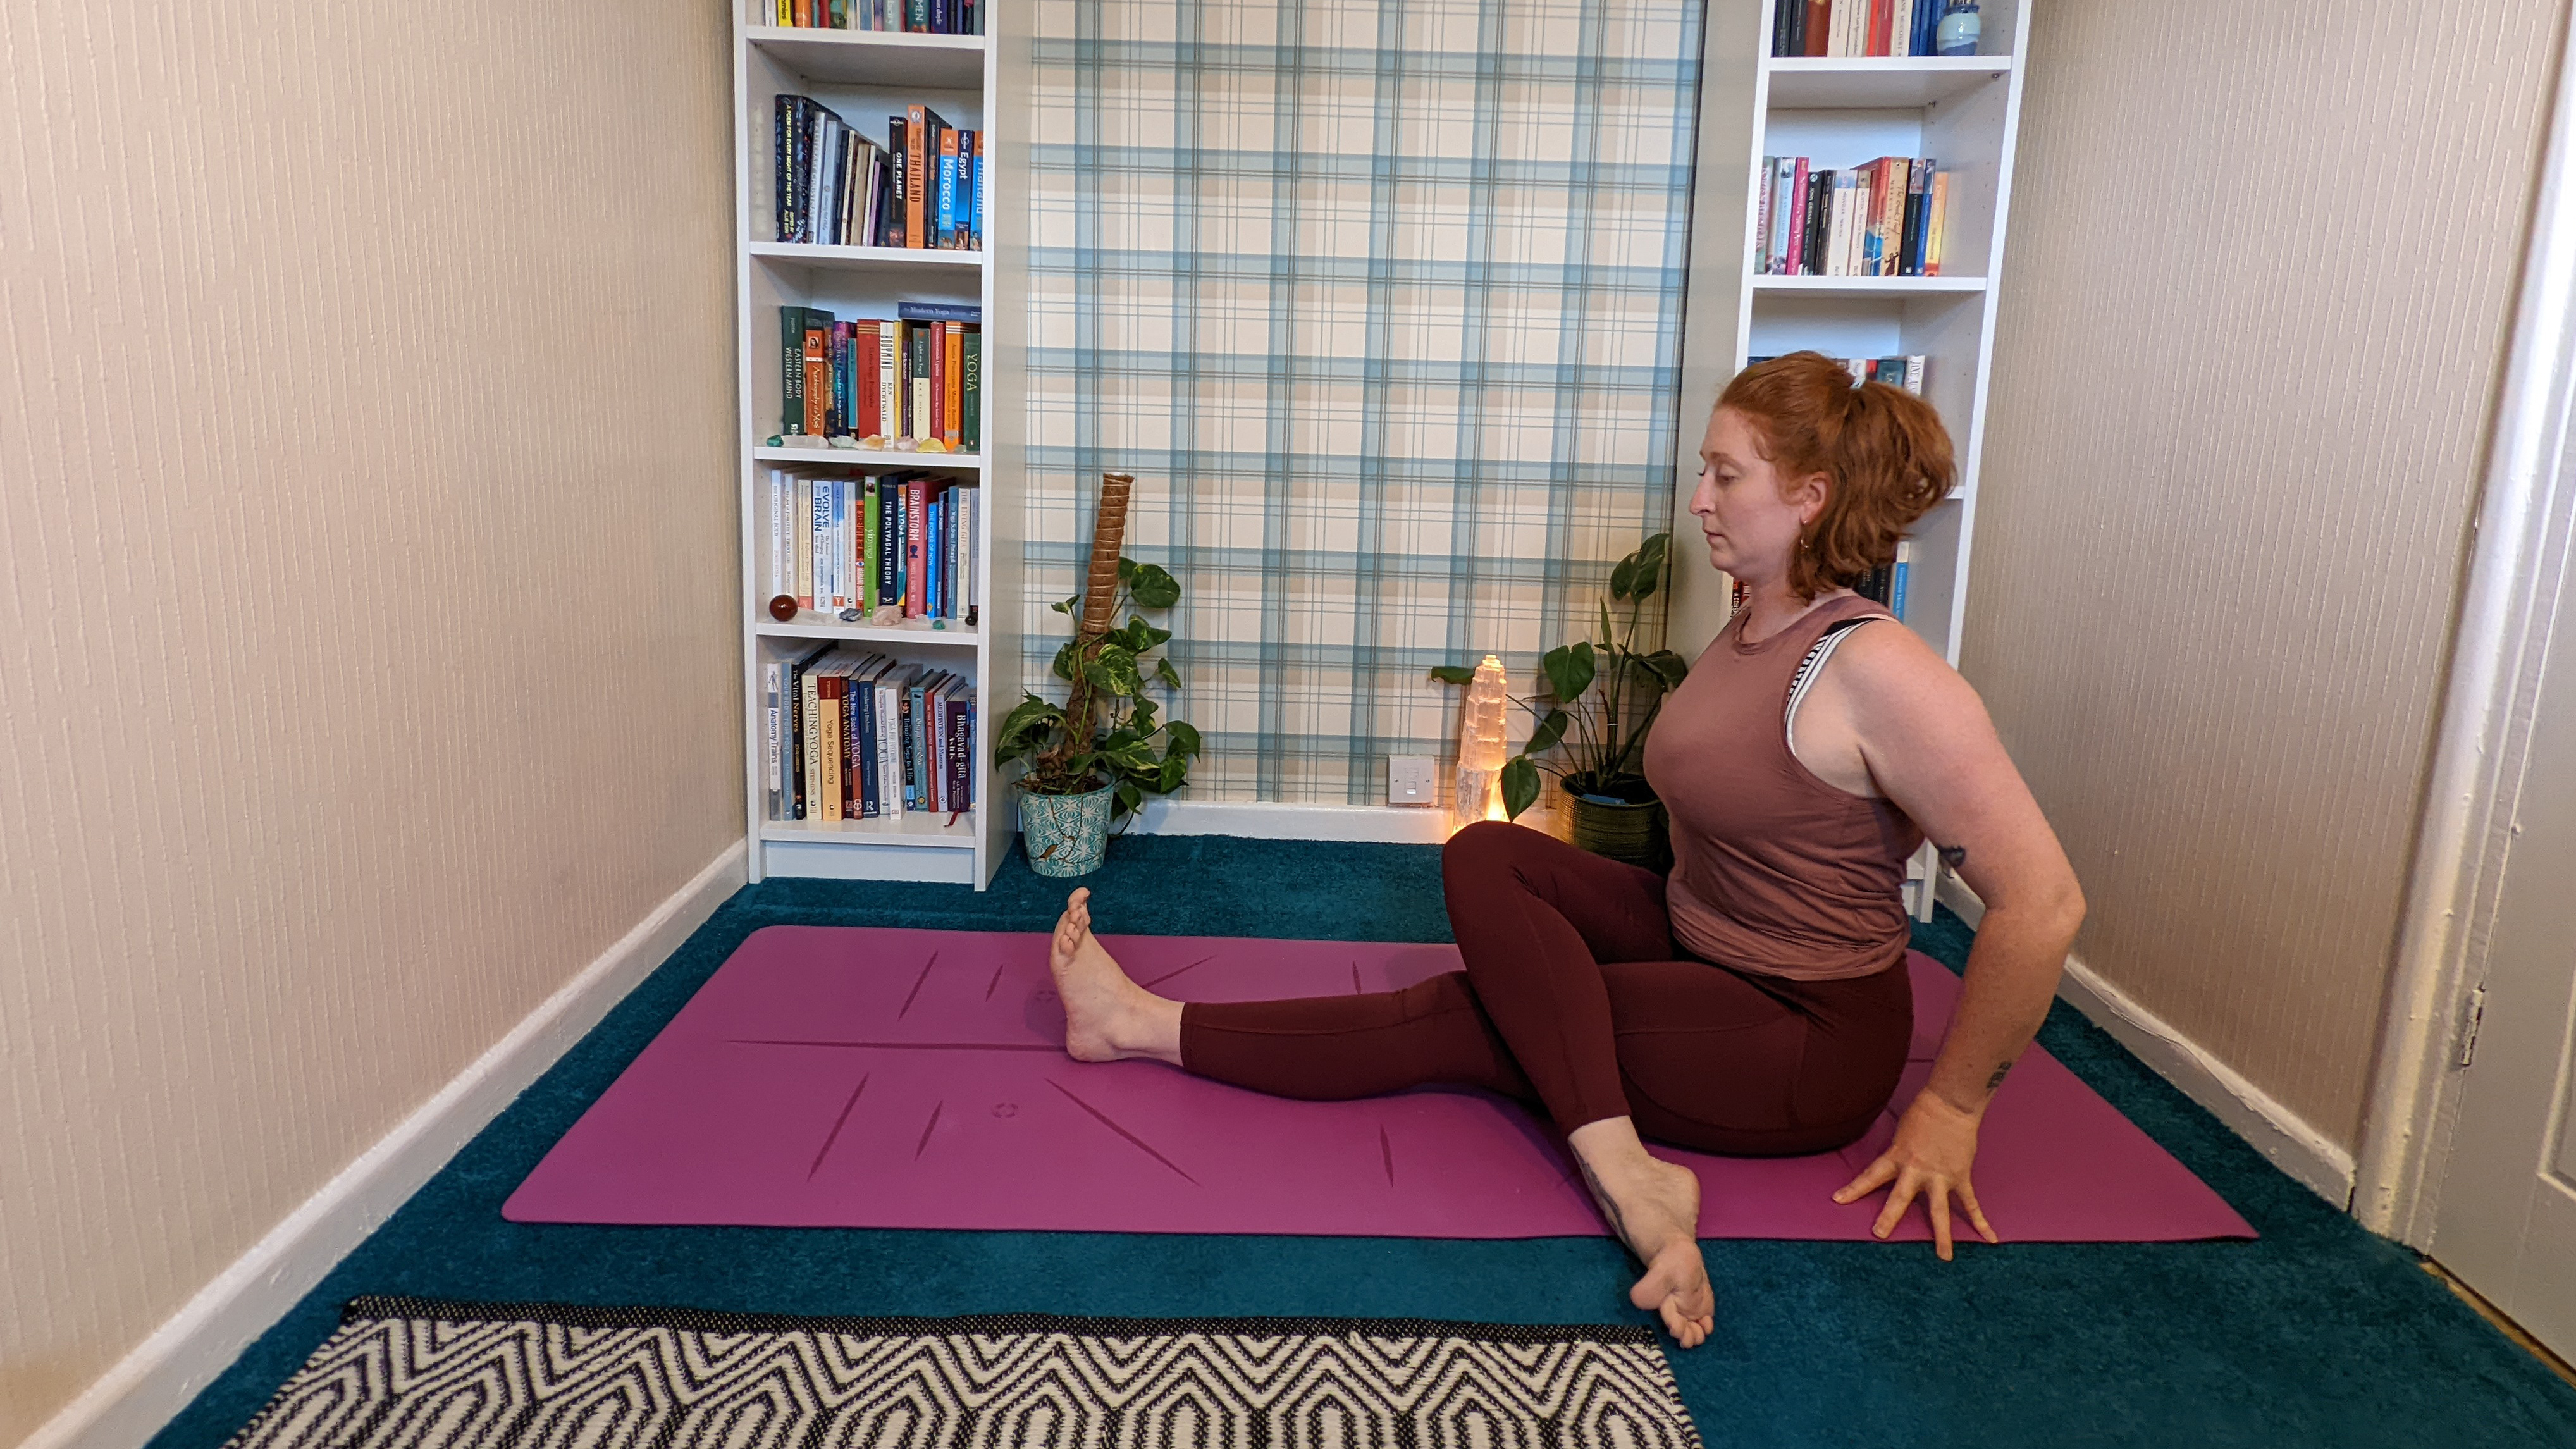
Step 1: Come to sit on your yoga mat with your legs outstretched in front of you.
Step 2: Bring your right leg to cross over your left, placing your right heel next to your left hip.
Step 3: If your right knee remains high, try sitting on a folded blanket or cushion to lift your hips.
Step 4: Place your hands next to your hips and lengthen your spine. Take 5 deep breaths here before changing the legs, taking your left heel to the right hip.
Cow face pose is great for opening up the outer hips and lower back. We have already worked the groins, inner thighs, hip flexors and psoas. Now we turn to the outer hips to release tension and aid our mobility.
Reclined pigeon pose
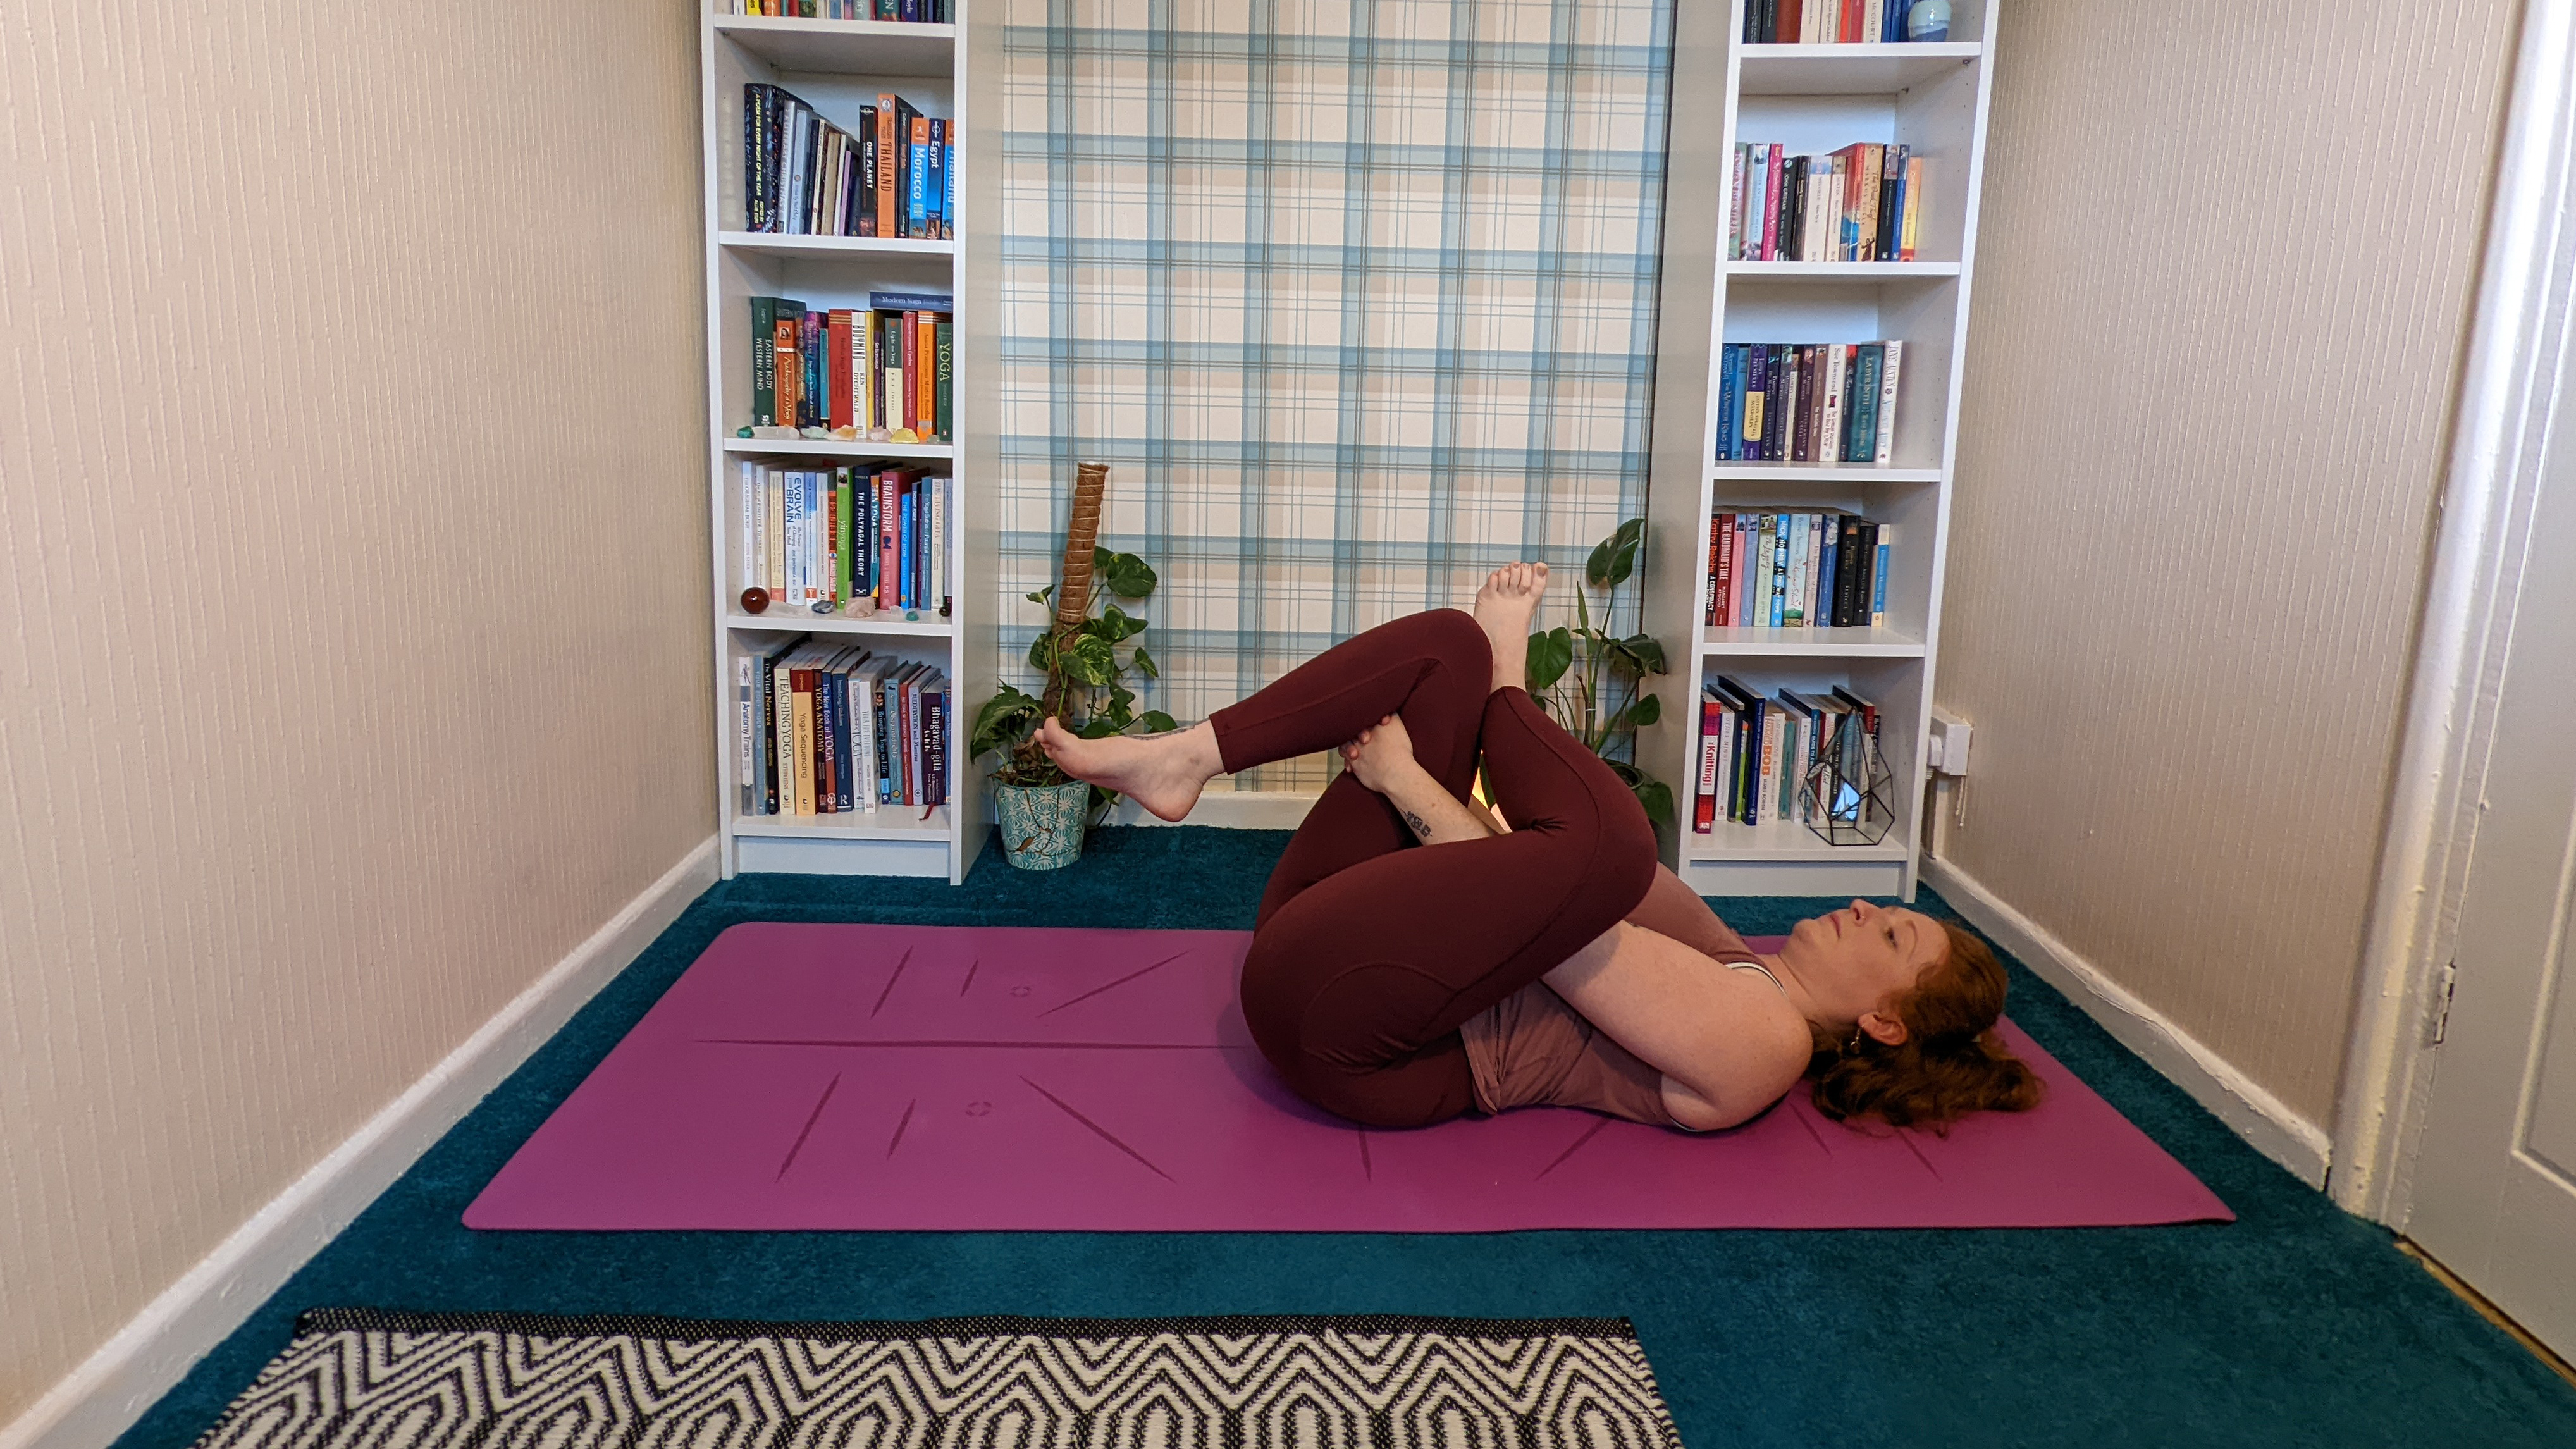
Step 1: Bring yourself to lie on your back. Bend your knees and place your right ankle above your left knee, onto your thigh. Inhale here.
Step 2: As you exhale, lift your left foot off the floor and take the back of your left thigh with your hands. Place one arm between the legs and one round the outside.
Step 3: Keep your head resting on the floor or, if it starts to lift as you bring your left foot off the floor, place it onto a cushion or folded blanket.
Step 4: Take 4 deep breaths here before releasing your grip and placing the feet back to the floor. Repeat, crossing your left ankle above the right knee, onto your thigh.
This posture helps to open the outer hips and IT band. When these areas get tight, they can cause lower back pain which can limit the movement of our lower body, including the hips.
Legs up the wall
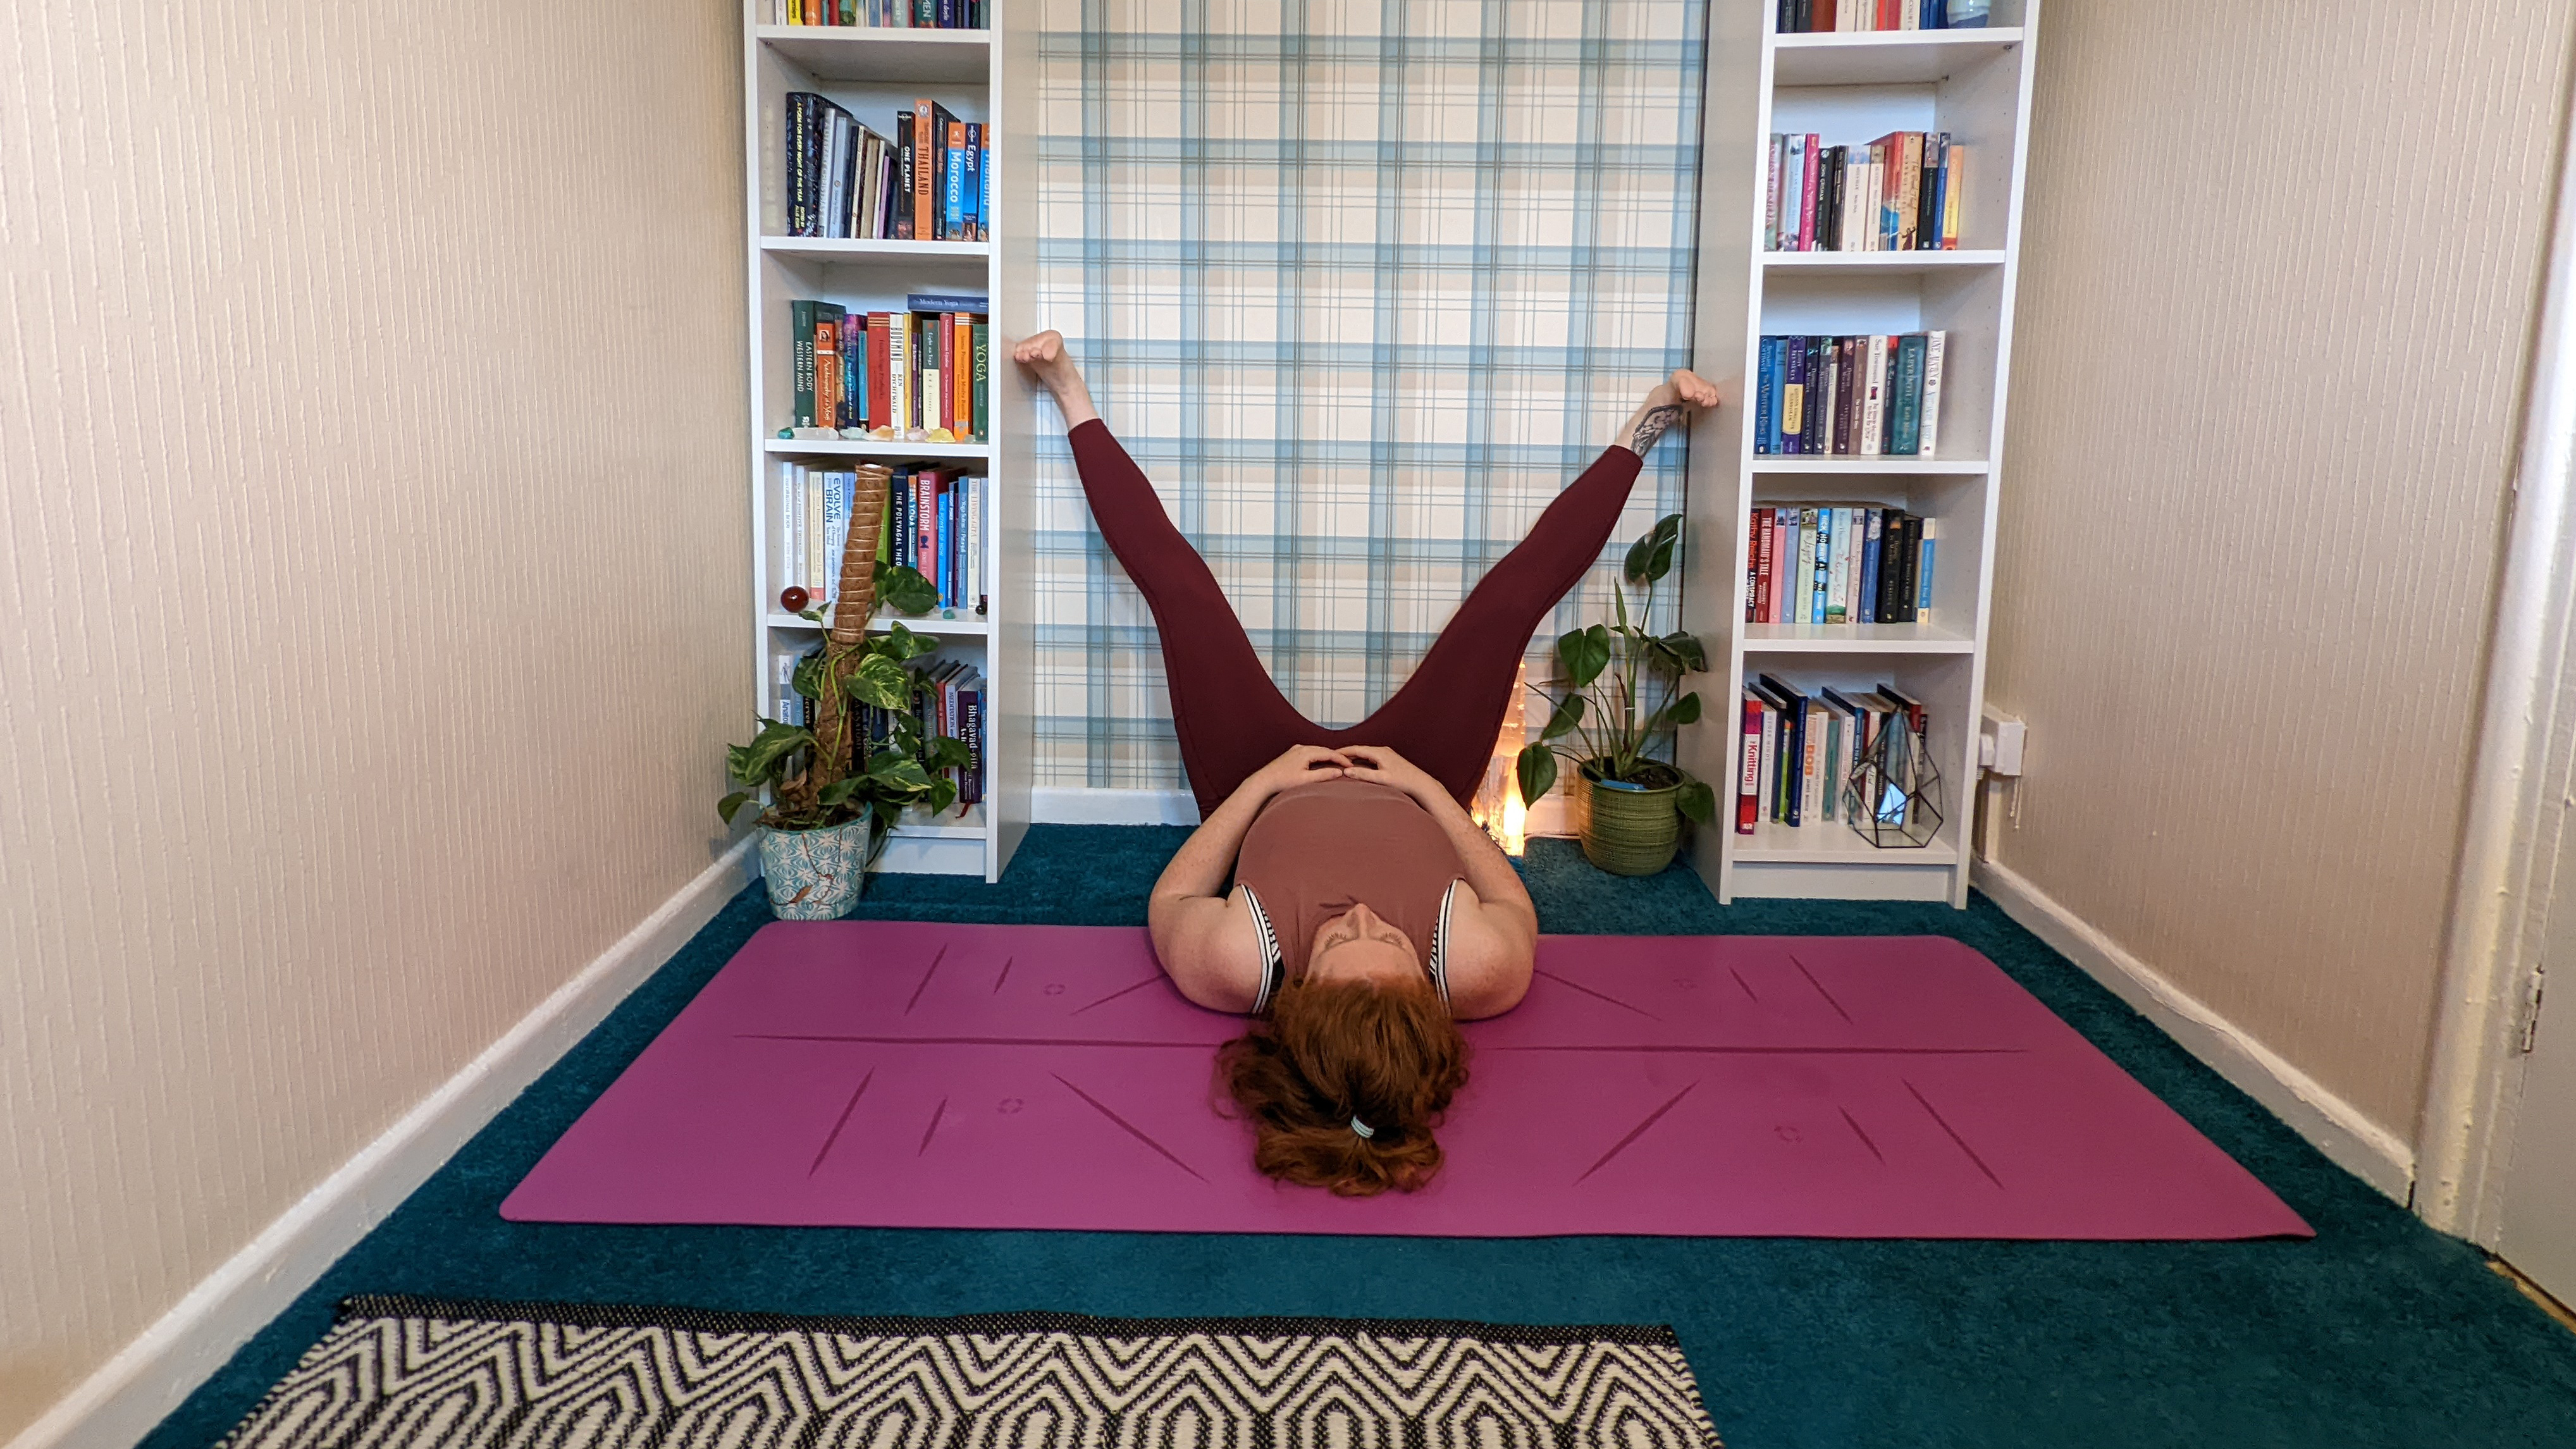
Step 1: Make your way to a clear wall. Lay a folded blanket next to the wall, horizontally.
Step 2: Sit on the blanket with your right hip to the wall. Begin to turn your legs up the wall as you lower your back to the floor.
Step 3: Get comfortable and then begin to take your legs wide. Allow the weight of your legs to draw them down towards the floor. You shouldn’t experience any pain behind the knees. If you do, please come out of this posture.
Step 4: Stay here for 2 minutes before gently lifting your legs back towards each other and bringing them into your chest. Roll to one side to bring yourself back up to sitting.
Practicing a restorative posture such as this is a great way to end your flow and rest the hips. In this posture, we are aiming to allow gravity to do the work so we’re working on the connective tissues rather than the larger muscles. This is a wonderful way to improve your flexibility and mobility as both connective tissues and muscles play a part.
Kat is a yoga teacher with over five years teaching experience with a speciality in supporting injured students. She is qualified to teach Hormone Yoga Therapy and is currently studying to become a Yoga Therapy Practitioner. Alongside this, Kat has written about yoga and mindfulness for T3 and is the founder of Kalindi Yoga.

