Boost your mobility and relax your shoulders with this six-move stretching routine
Relieve pain, boost your flexibility, and reduce your risk of injury in just 15 minutes with this short routine
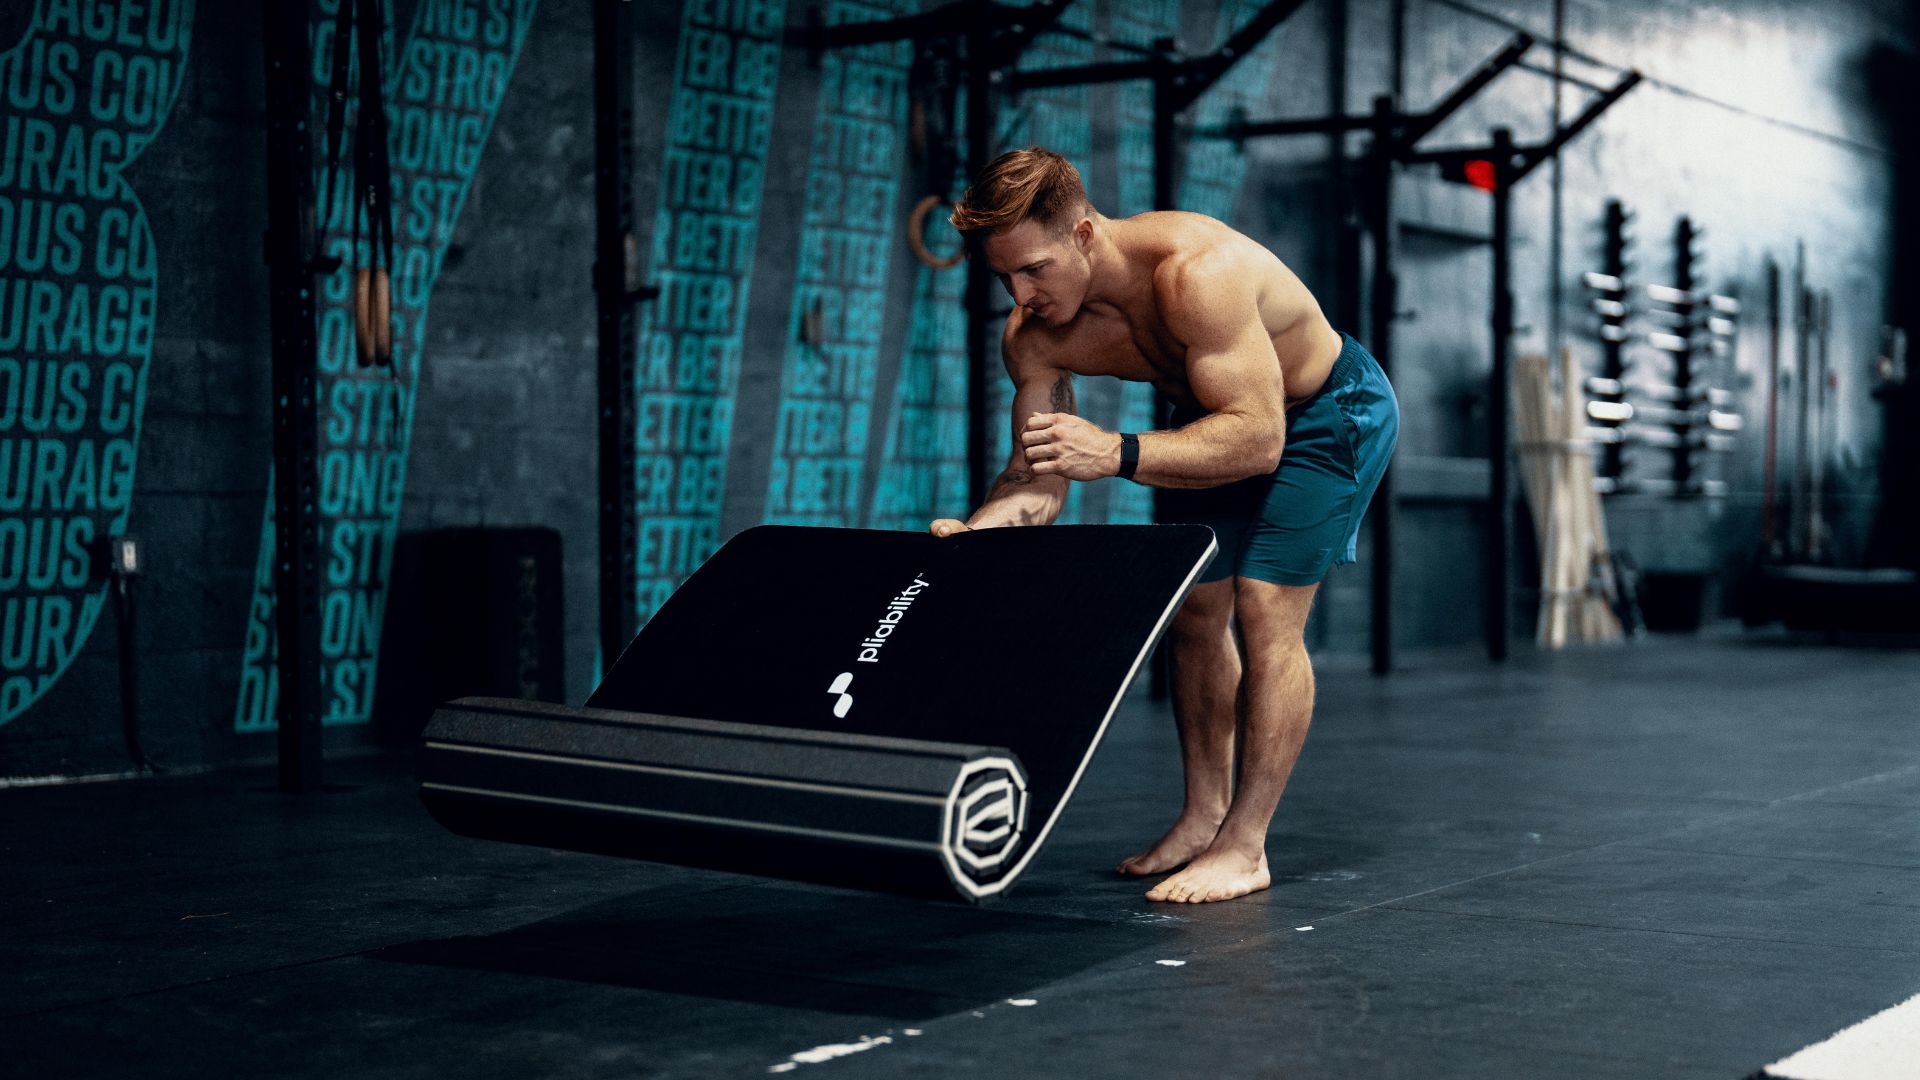

When many of us spend our days hunched over a computer, it's hardly surprising that neck and shoulder pain are so common. But there are ways to undo this damage and provide some welcome relief from the aches that comes with it.
This stretching routine from fitness app Pliability uses just six moves to kickstart your recovery. None of them require any equipment either (although we would recommend using a yoga mat for comfort), so you can tackle them at the gym or in the comfort of your own home.
Pliability's Director of Performance, Cody Mooney, says the routine has been designed "to loosen and strengthen" the shoulders and neck, "bringing flexibility and mobility to help with discomfort and allow your body to move freely."
We've listed all the moves you need below, with instructions on how to get into the stretch, where you should feel it, and adjustment tips to get the form right. Plus, Mooney explains the benefits of each move.
1. Wall isometric rotation holds
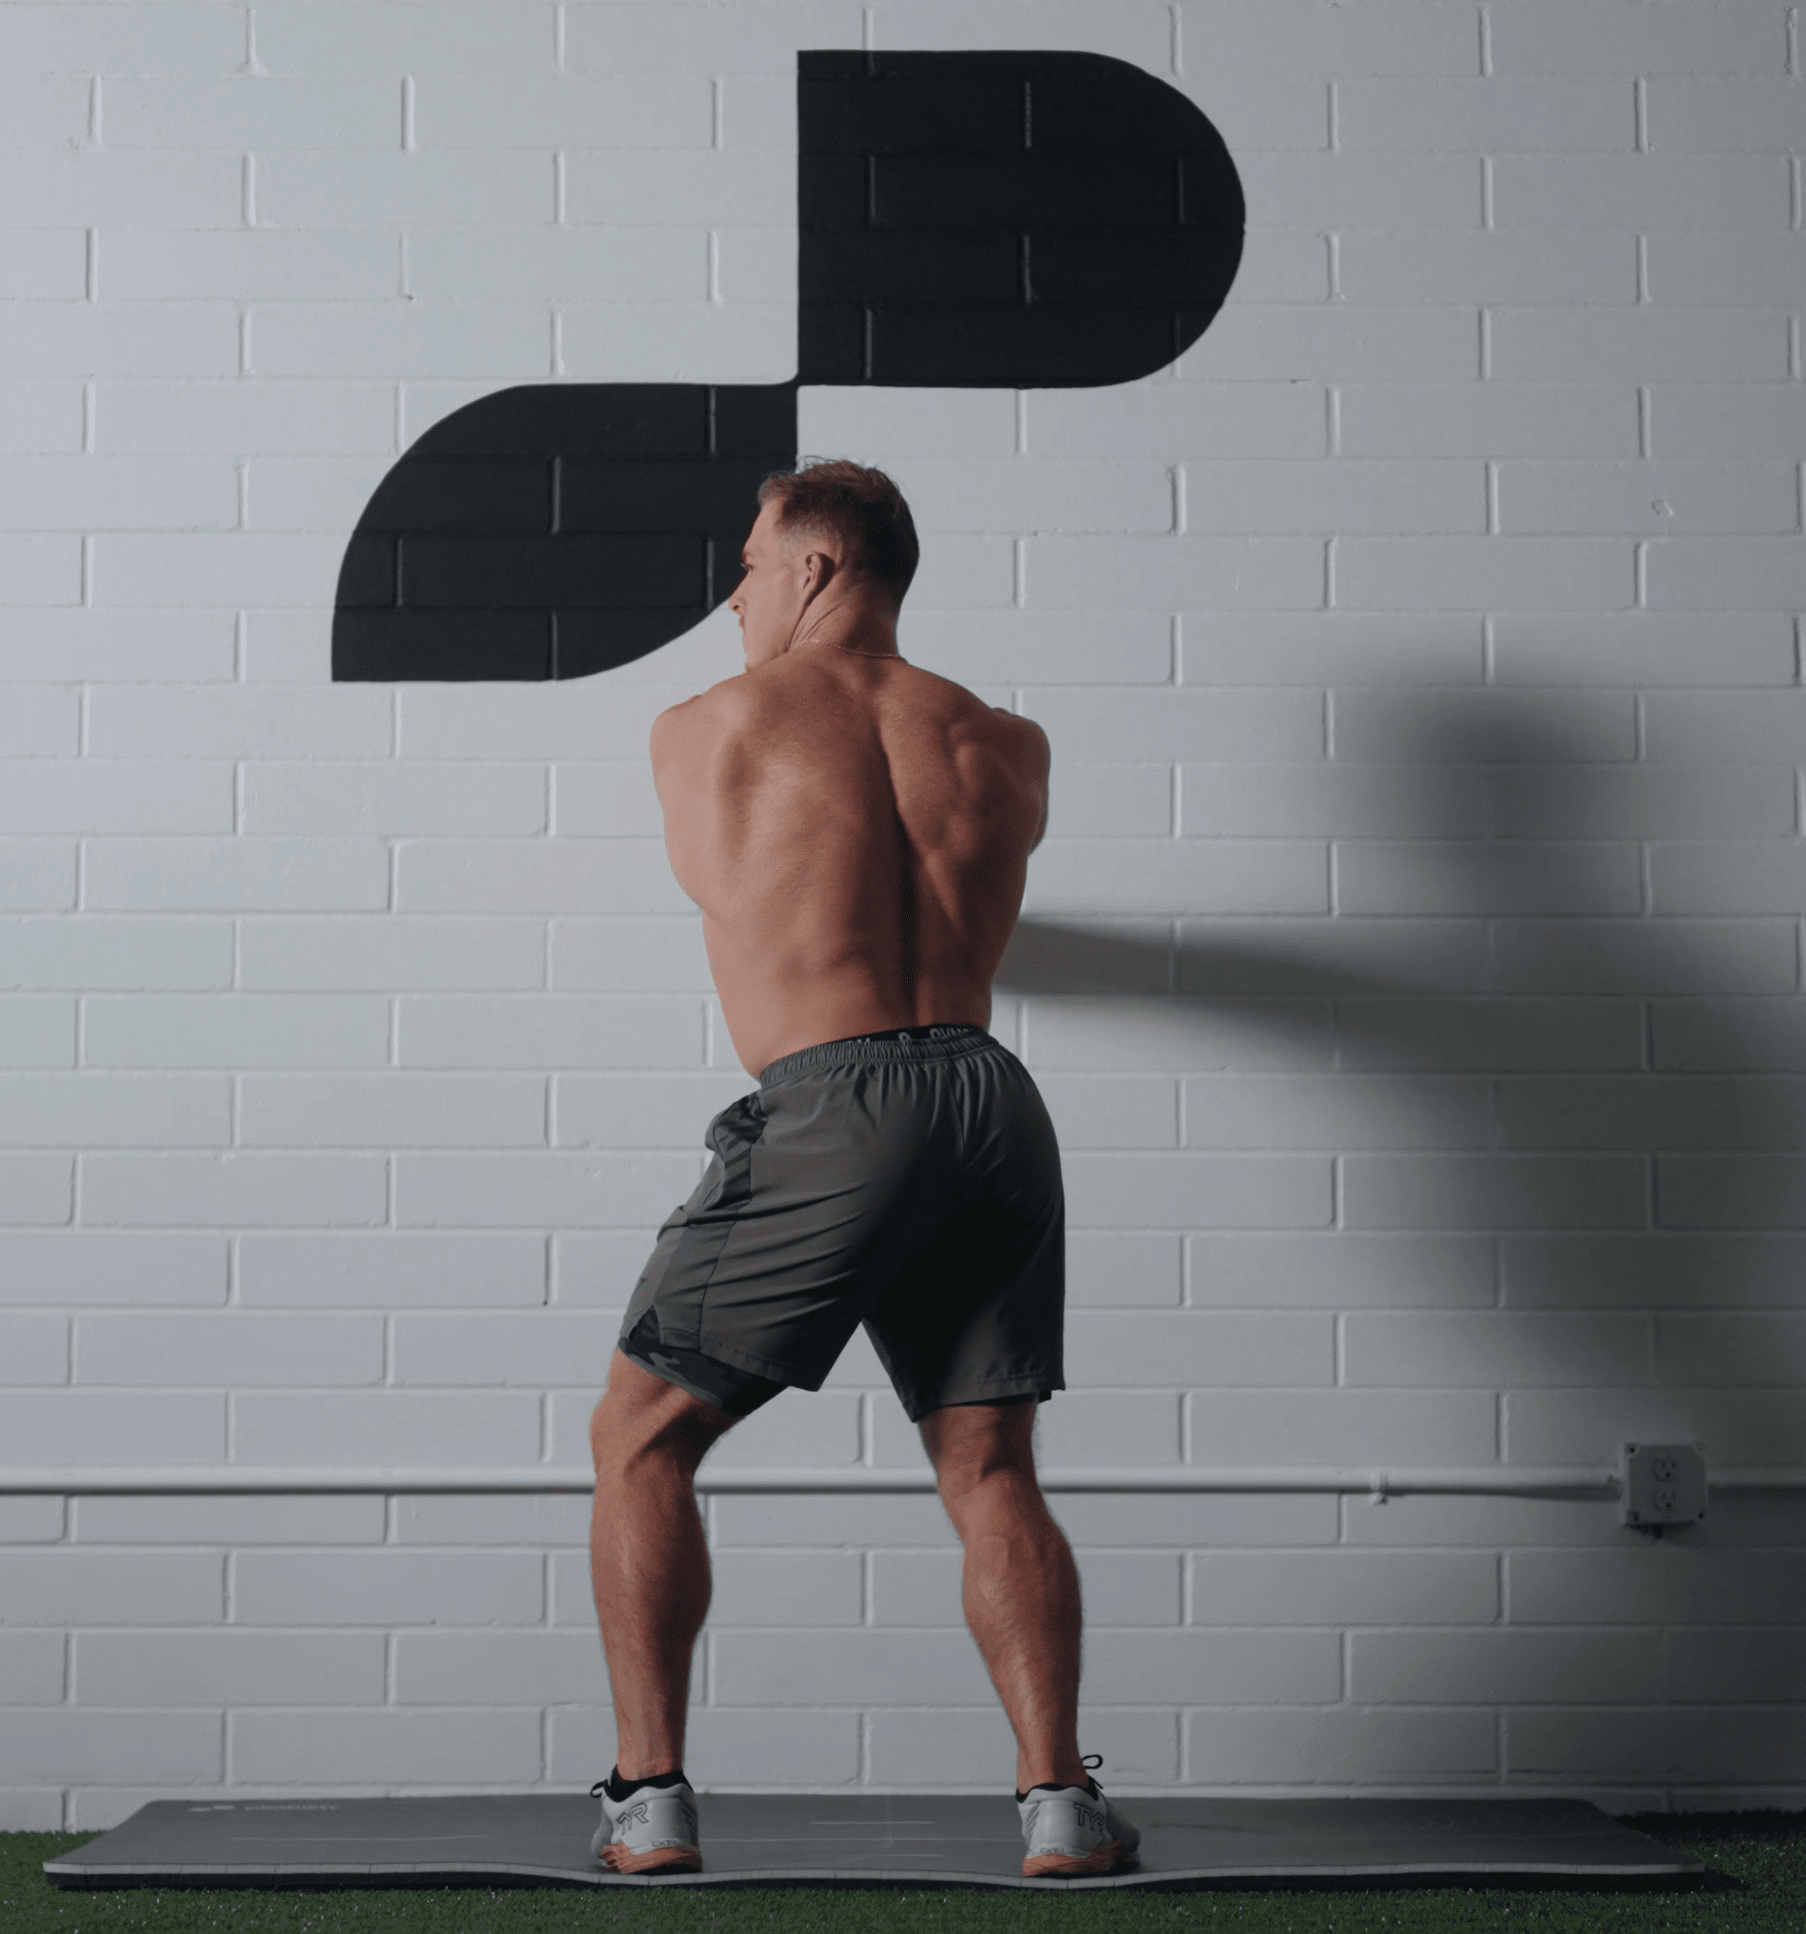
- Stand arm's-length away from a wall and place both hands on it with your fingers facing down and your elbows fully extended.
- Attempt to turn your hips to the right while trying to keep your trunk facing the wall.
- Hold this position for two deep breaths then relax.
- Now switch sides, attempting to turn your hips to the left while keeping your trunk facing forward., keeping your core engaged throughout. If you have any lower back pain, back off the pressure and re-tilt your pelvis.
- Continue to alternate directions for two minutes.
Why do it?
"This pose helps strengthen your rotator cuff muscles, helping to reduce stress in your neck and shoulder area, as well as improving your overall balance," Mooney says.
2. PNF shoulder external rotation two-way stretch
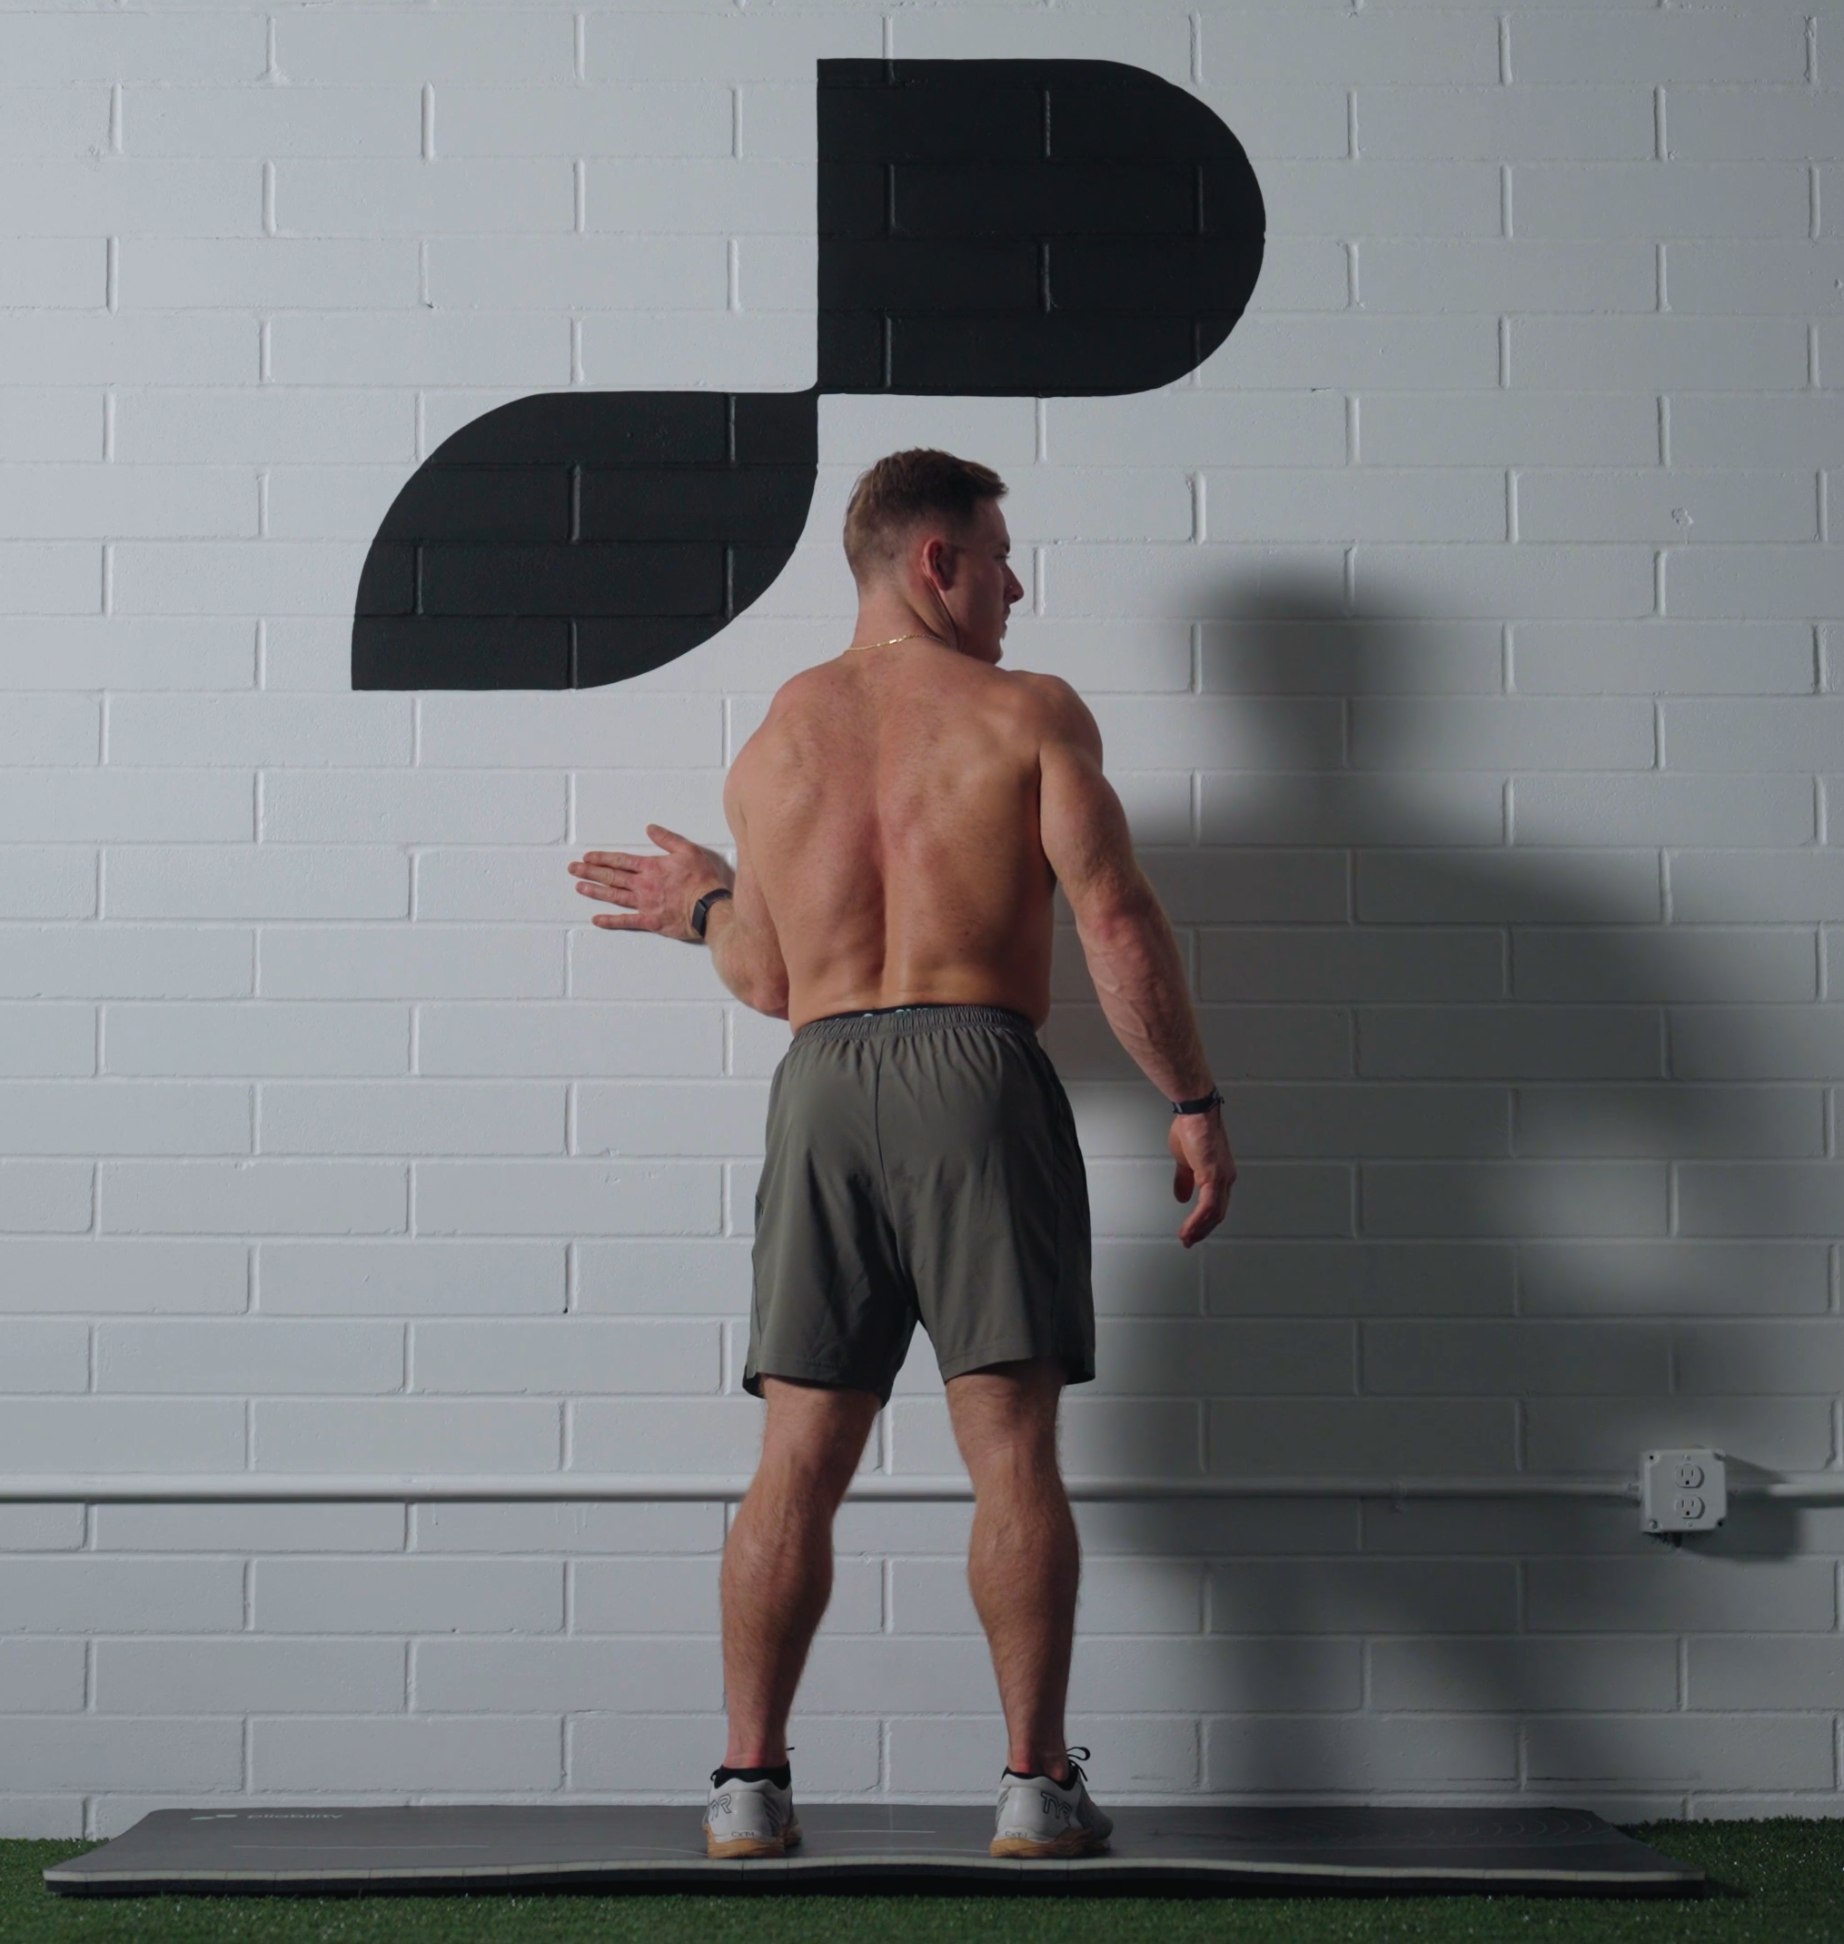
- Start by facing a wall, then bend your left elbow and place your left hand on the wall.
- Turn your body to the right (you should feel a stretch in your left shoulder) then gently press your left hand into the wall and take one deep breath. As you exhale, relax.
- Repeat this two more times, trying to twist slightly further to the right with each new breath, then switch sides so your right hand is pressed against the wall.
- Only turn so far as to feel the stretch in the shoulder, and move slowly throughout this stretch. Ease up if you feel any discomfort.
- Perform this stretch for a total of two minutes.
Why do it?
Get the Fit&Well Newsletter
Start your week with achievable workout ideas, health tips and wellbeing advice in your inbox.
Mooney says this pose will create more stability in the shoulder joint, improving your overall strength and the endurance of the surrounding muscles.
3. First rib mobilization
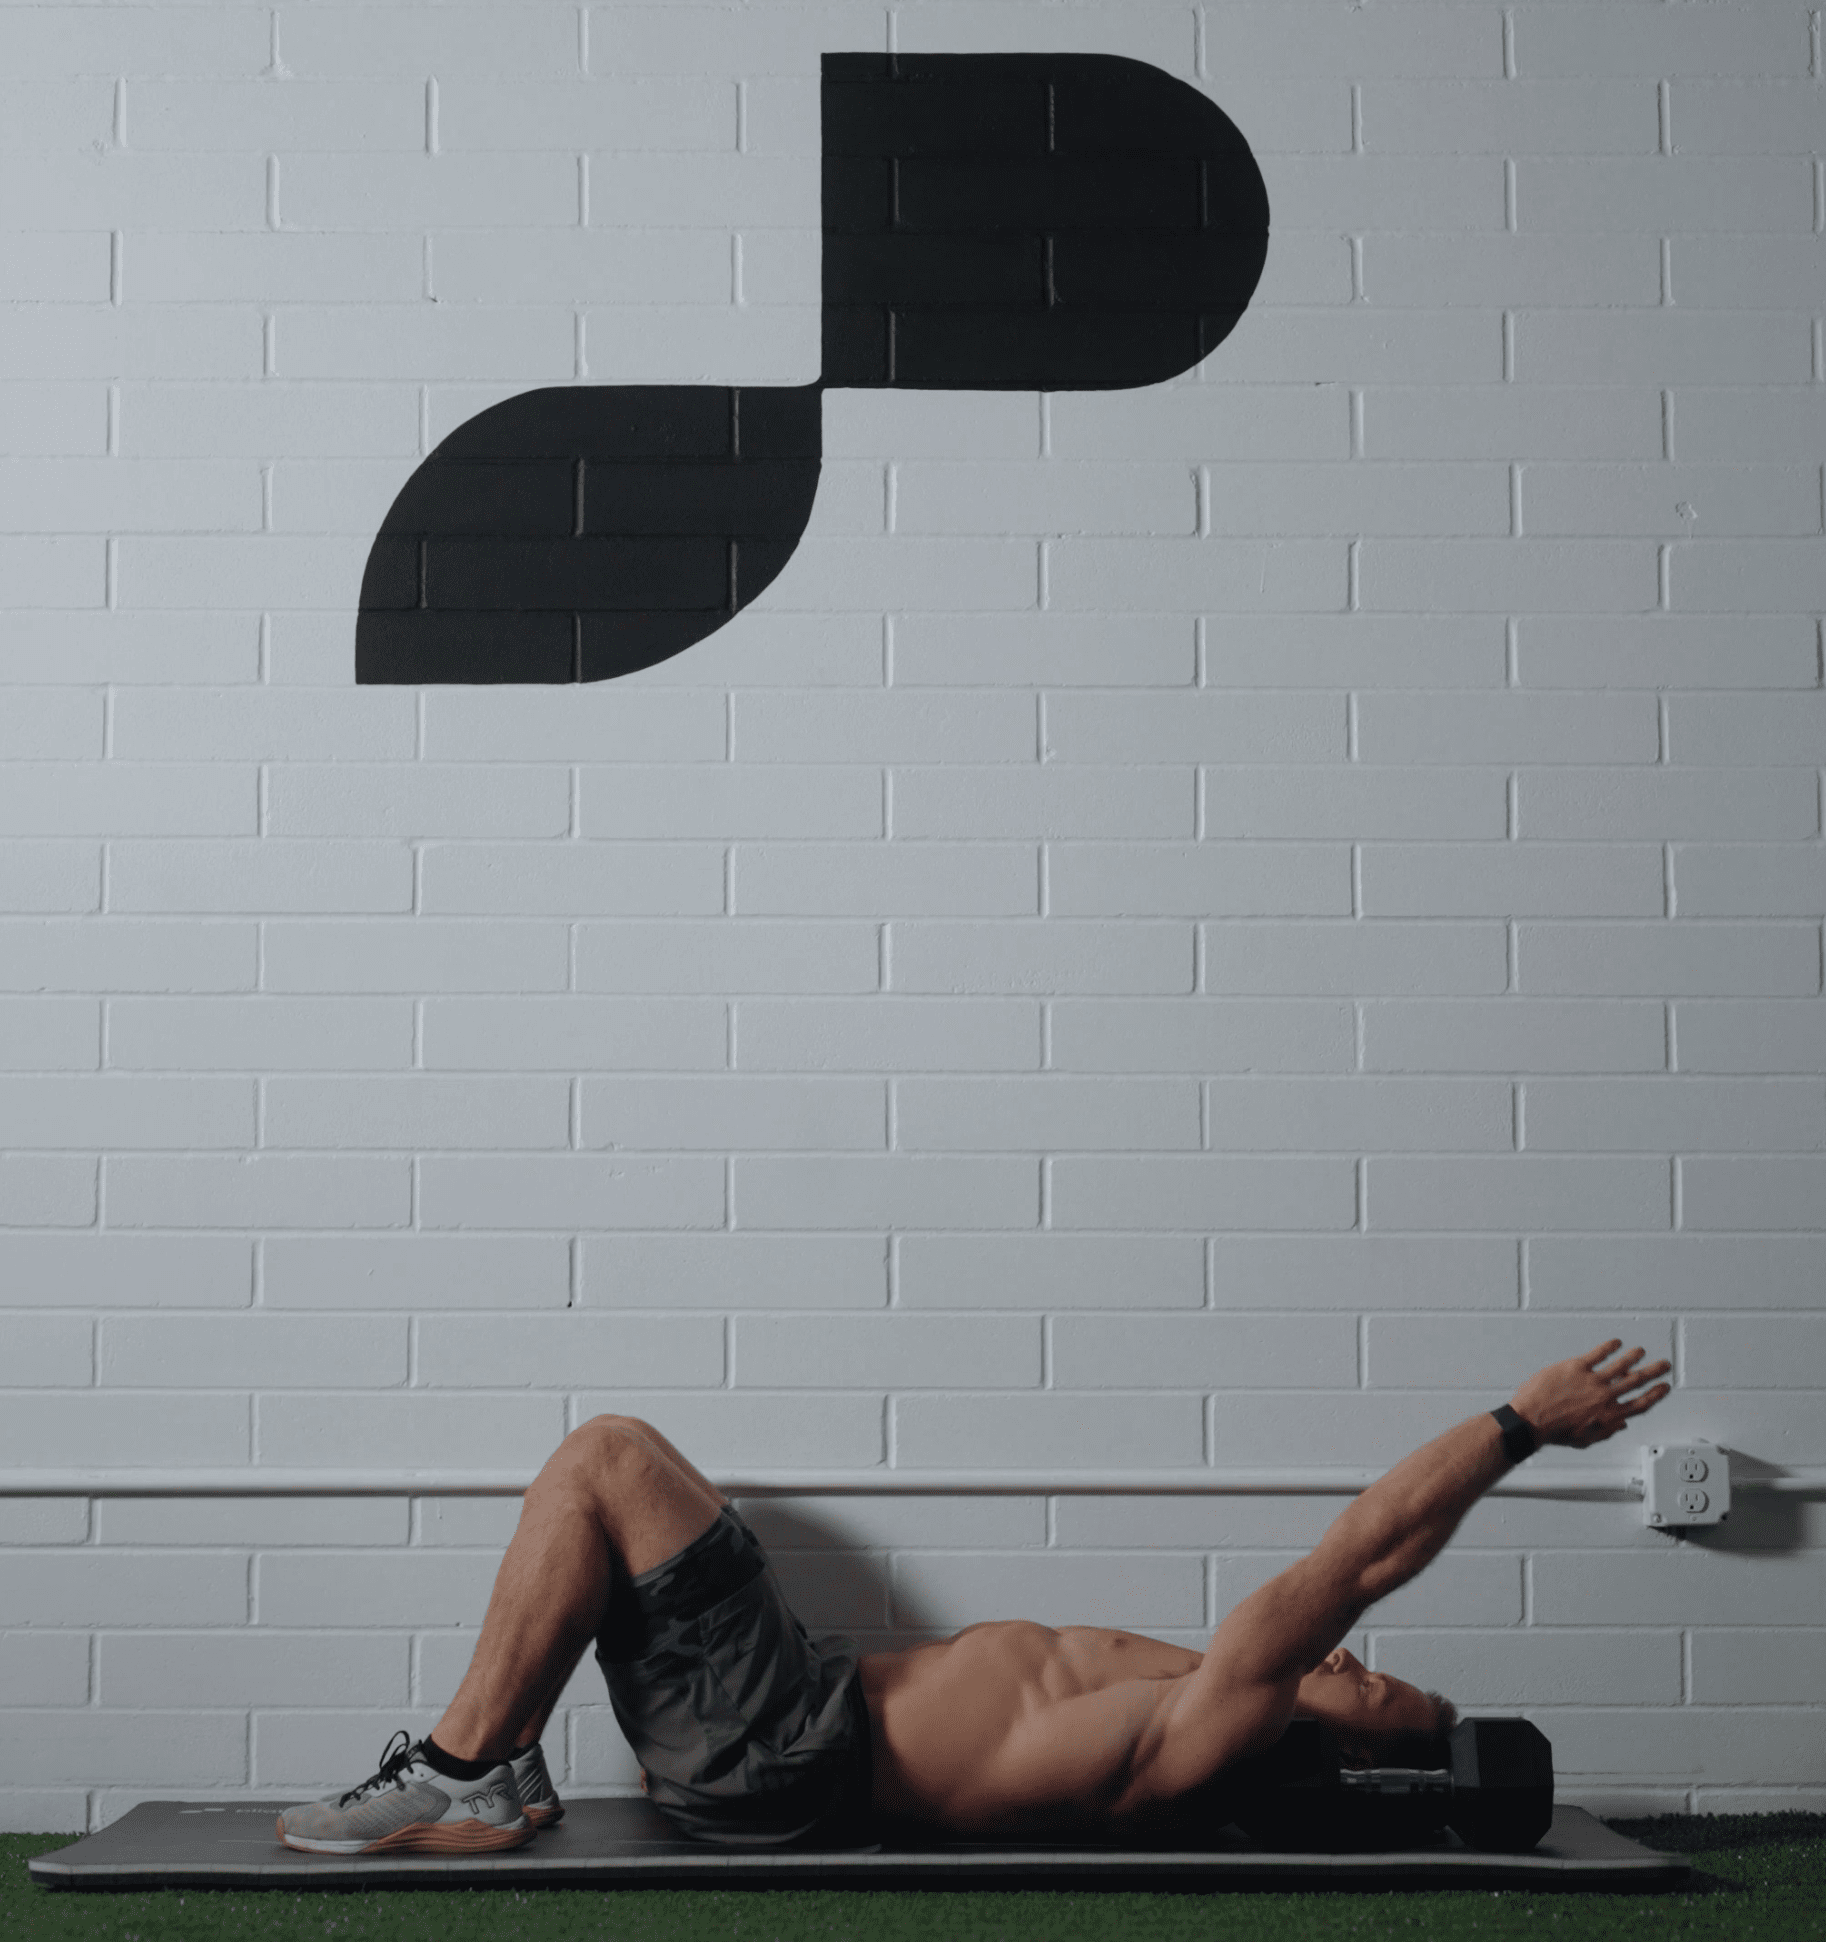
- You'll need a sturdy object to rest your shoulder against for this move. Ohlsen uses a dumbbell, but the corner of a wall will also work.
- Lie on your back with your knees raised, your arms by your side and the object pressing into the top of your left shoulder.
- Raise your left arm off the ground in an arc. Continue to back your body into the object, breathe, and raise your arm up and down for one minute.
- Switch the object to your right shoulder then repeat for another minute.
Why do it?
"Improving your overall mobility and the position of the first rib will help to alleviate any irritation occurring in your nerves and blood vessels, modulating your autonomic nervous system (responsible for bodily functions we do without thought like breathing and pumping blood around our body)," says Mooney.
4. Shoulder abduction and thoracic rotation
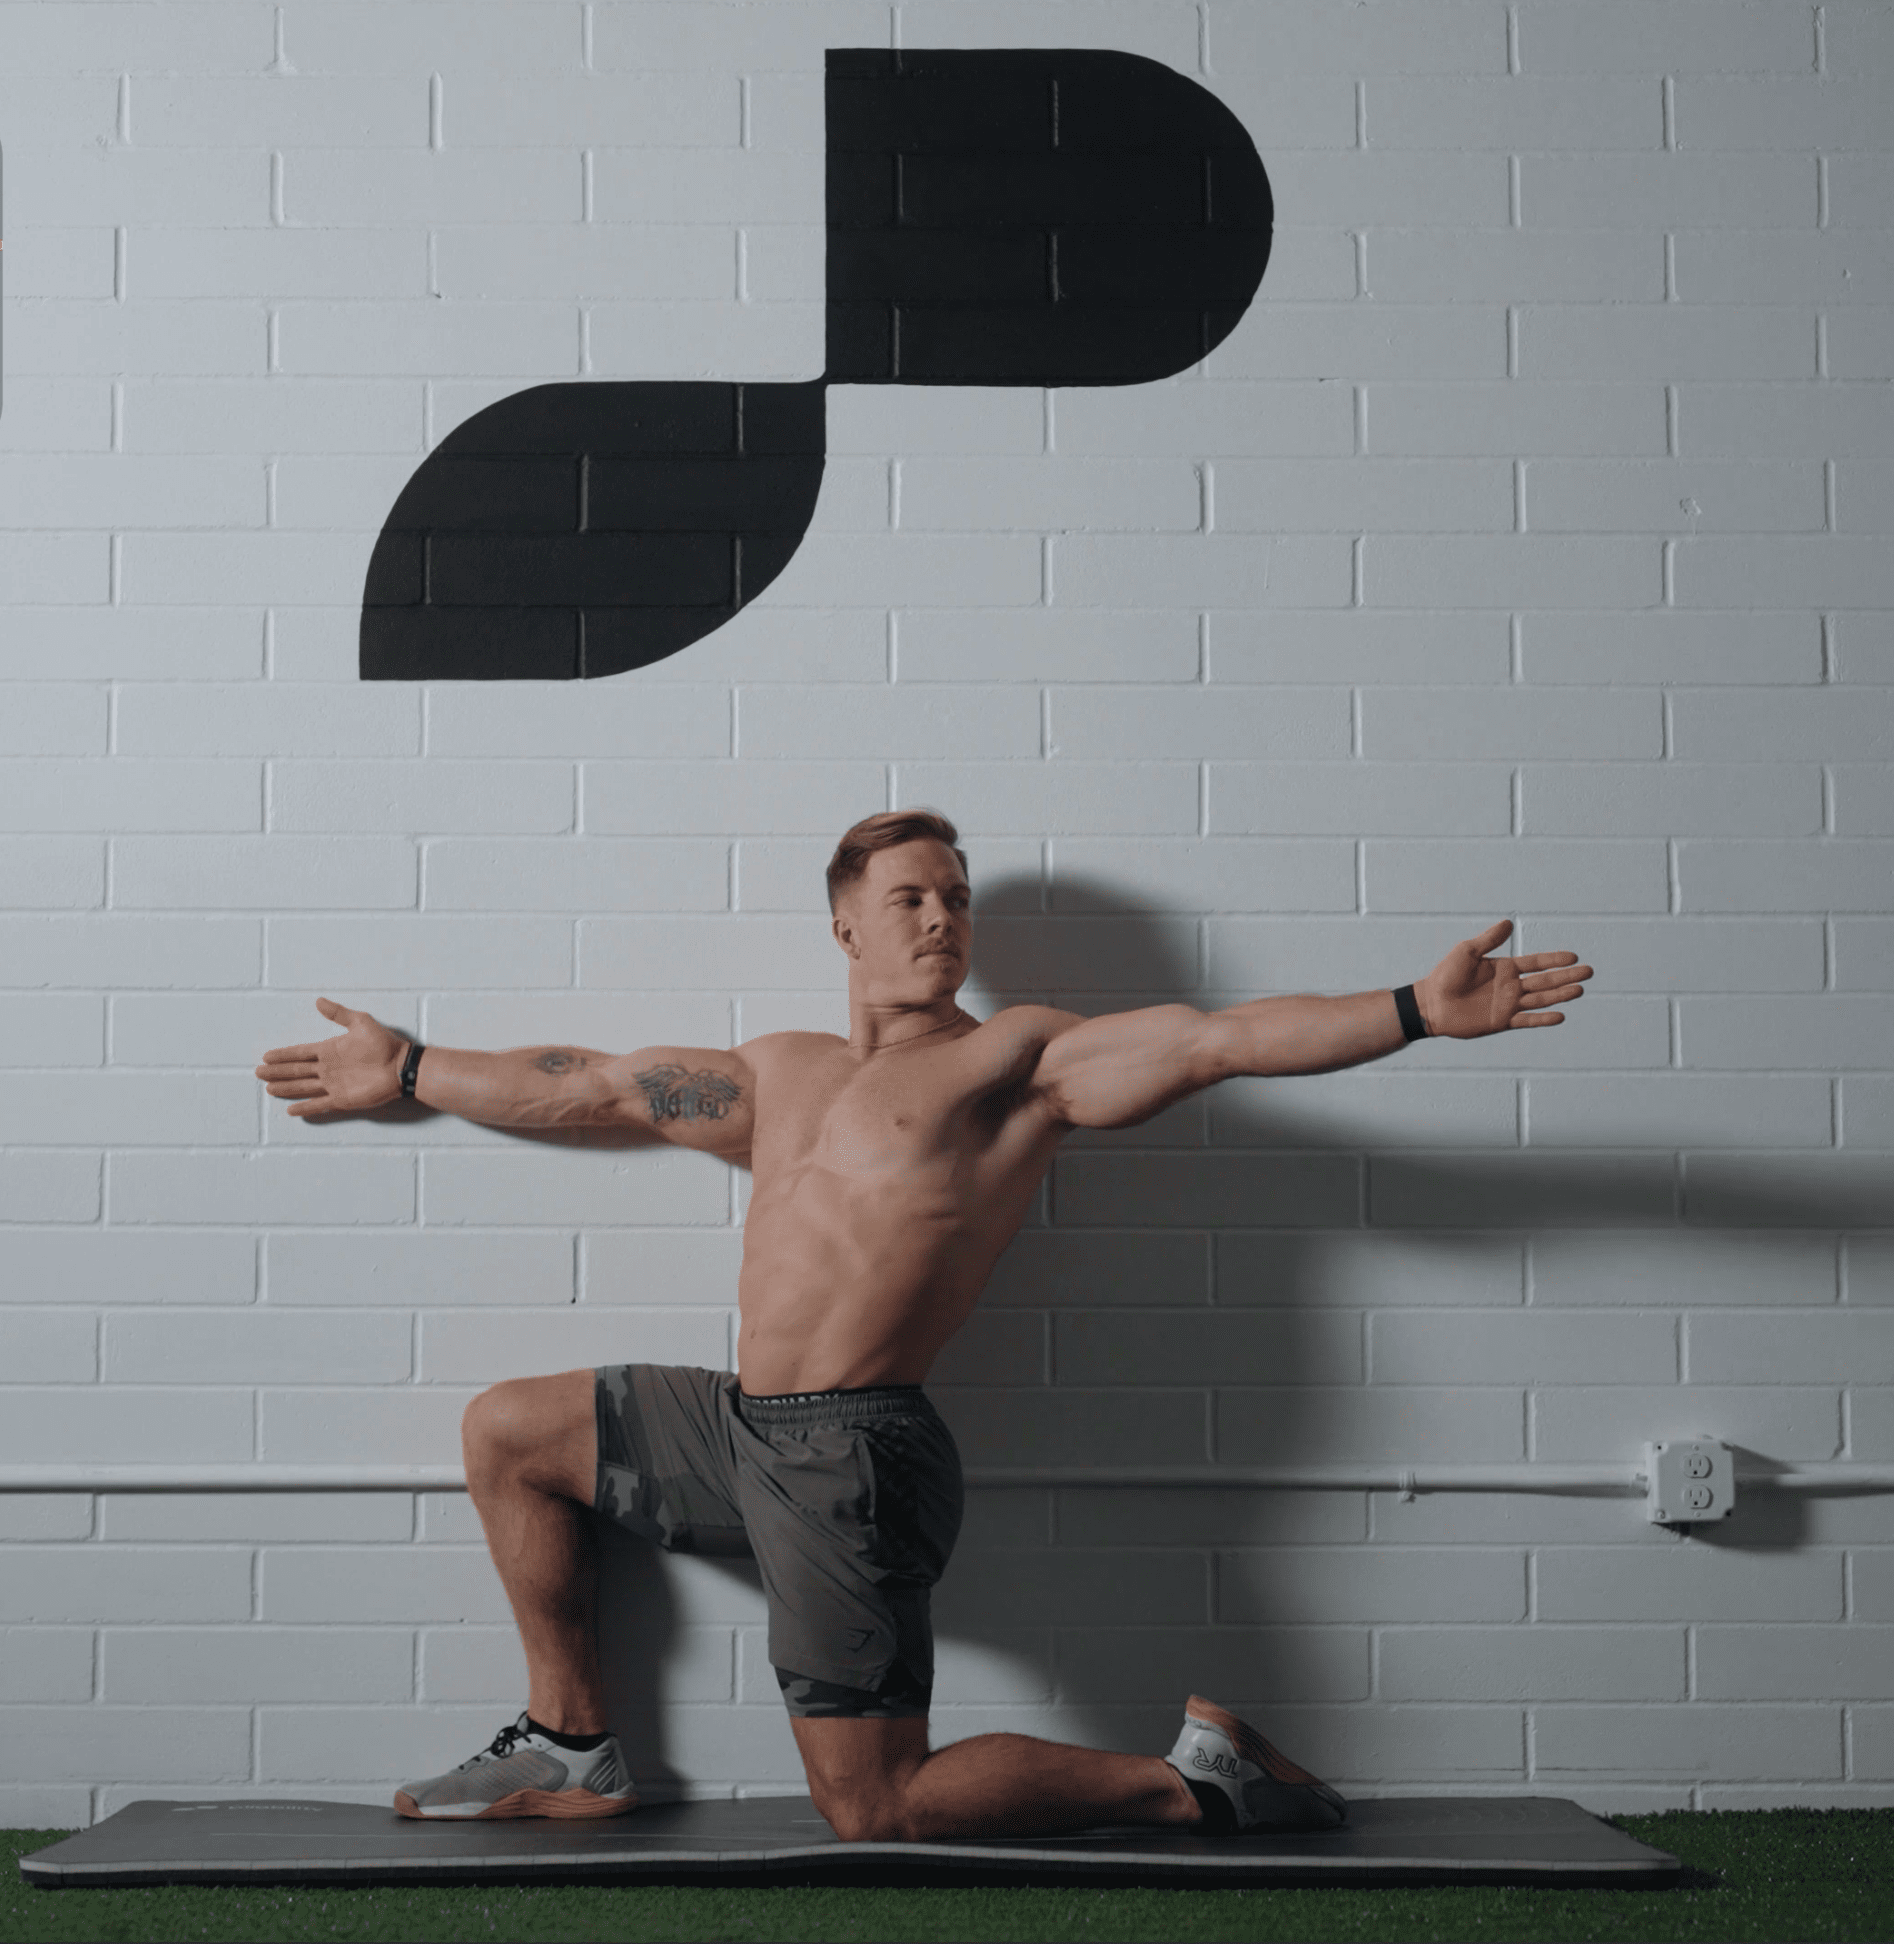
- Begin in a half-kneeling position with a wall on your left side and your left leg in front of you.
- Put both arms together straight out in front of you with your left shoulder and left hand against the wall.
- Keeping your left arm against the wall, twist your body to move your straight right arm away from it as far as you can. Both arms should stay straight and parallel with the floor.
- When you've moved your right arm round as far as you can, take a deep breath and try to twist slightly further around on the exhale. Then, return to the starting position.
- Switch sides so the wall is on the right side of your body then repeat using your left arm.
- Continue to switch between the two for two minutes, breathing at your end range of motion during each stretch.
Why do it?
Mooney explains that this pose will increase the "active range of motion" in the shoulder joint. This can ease pain, as well as improving the function of your shoulder.
5. Shoulder isometrics
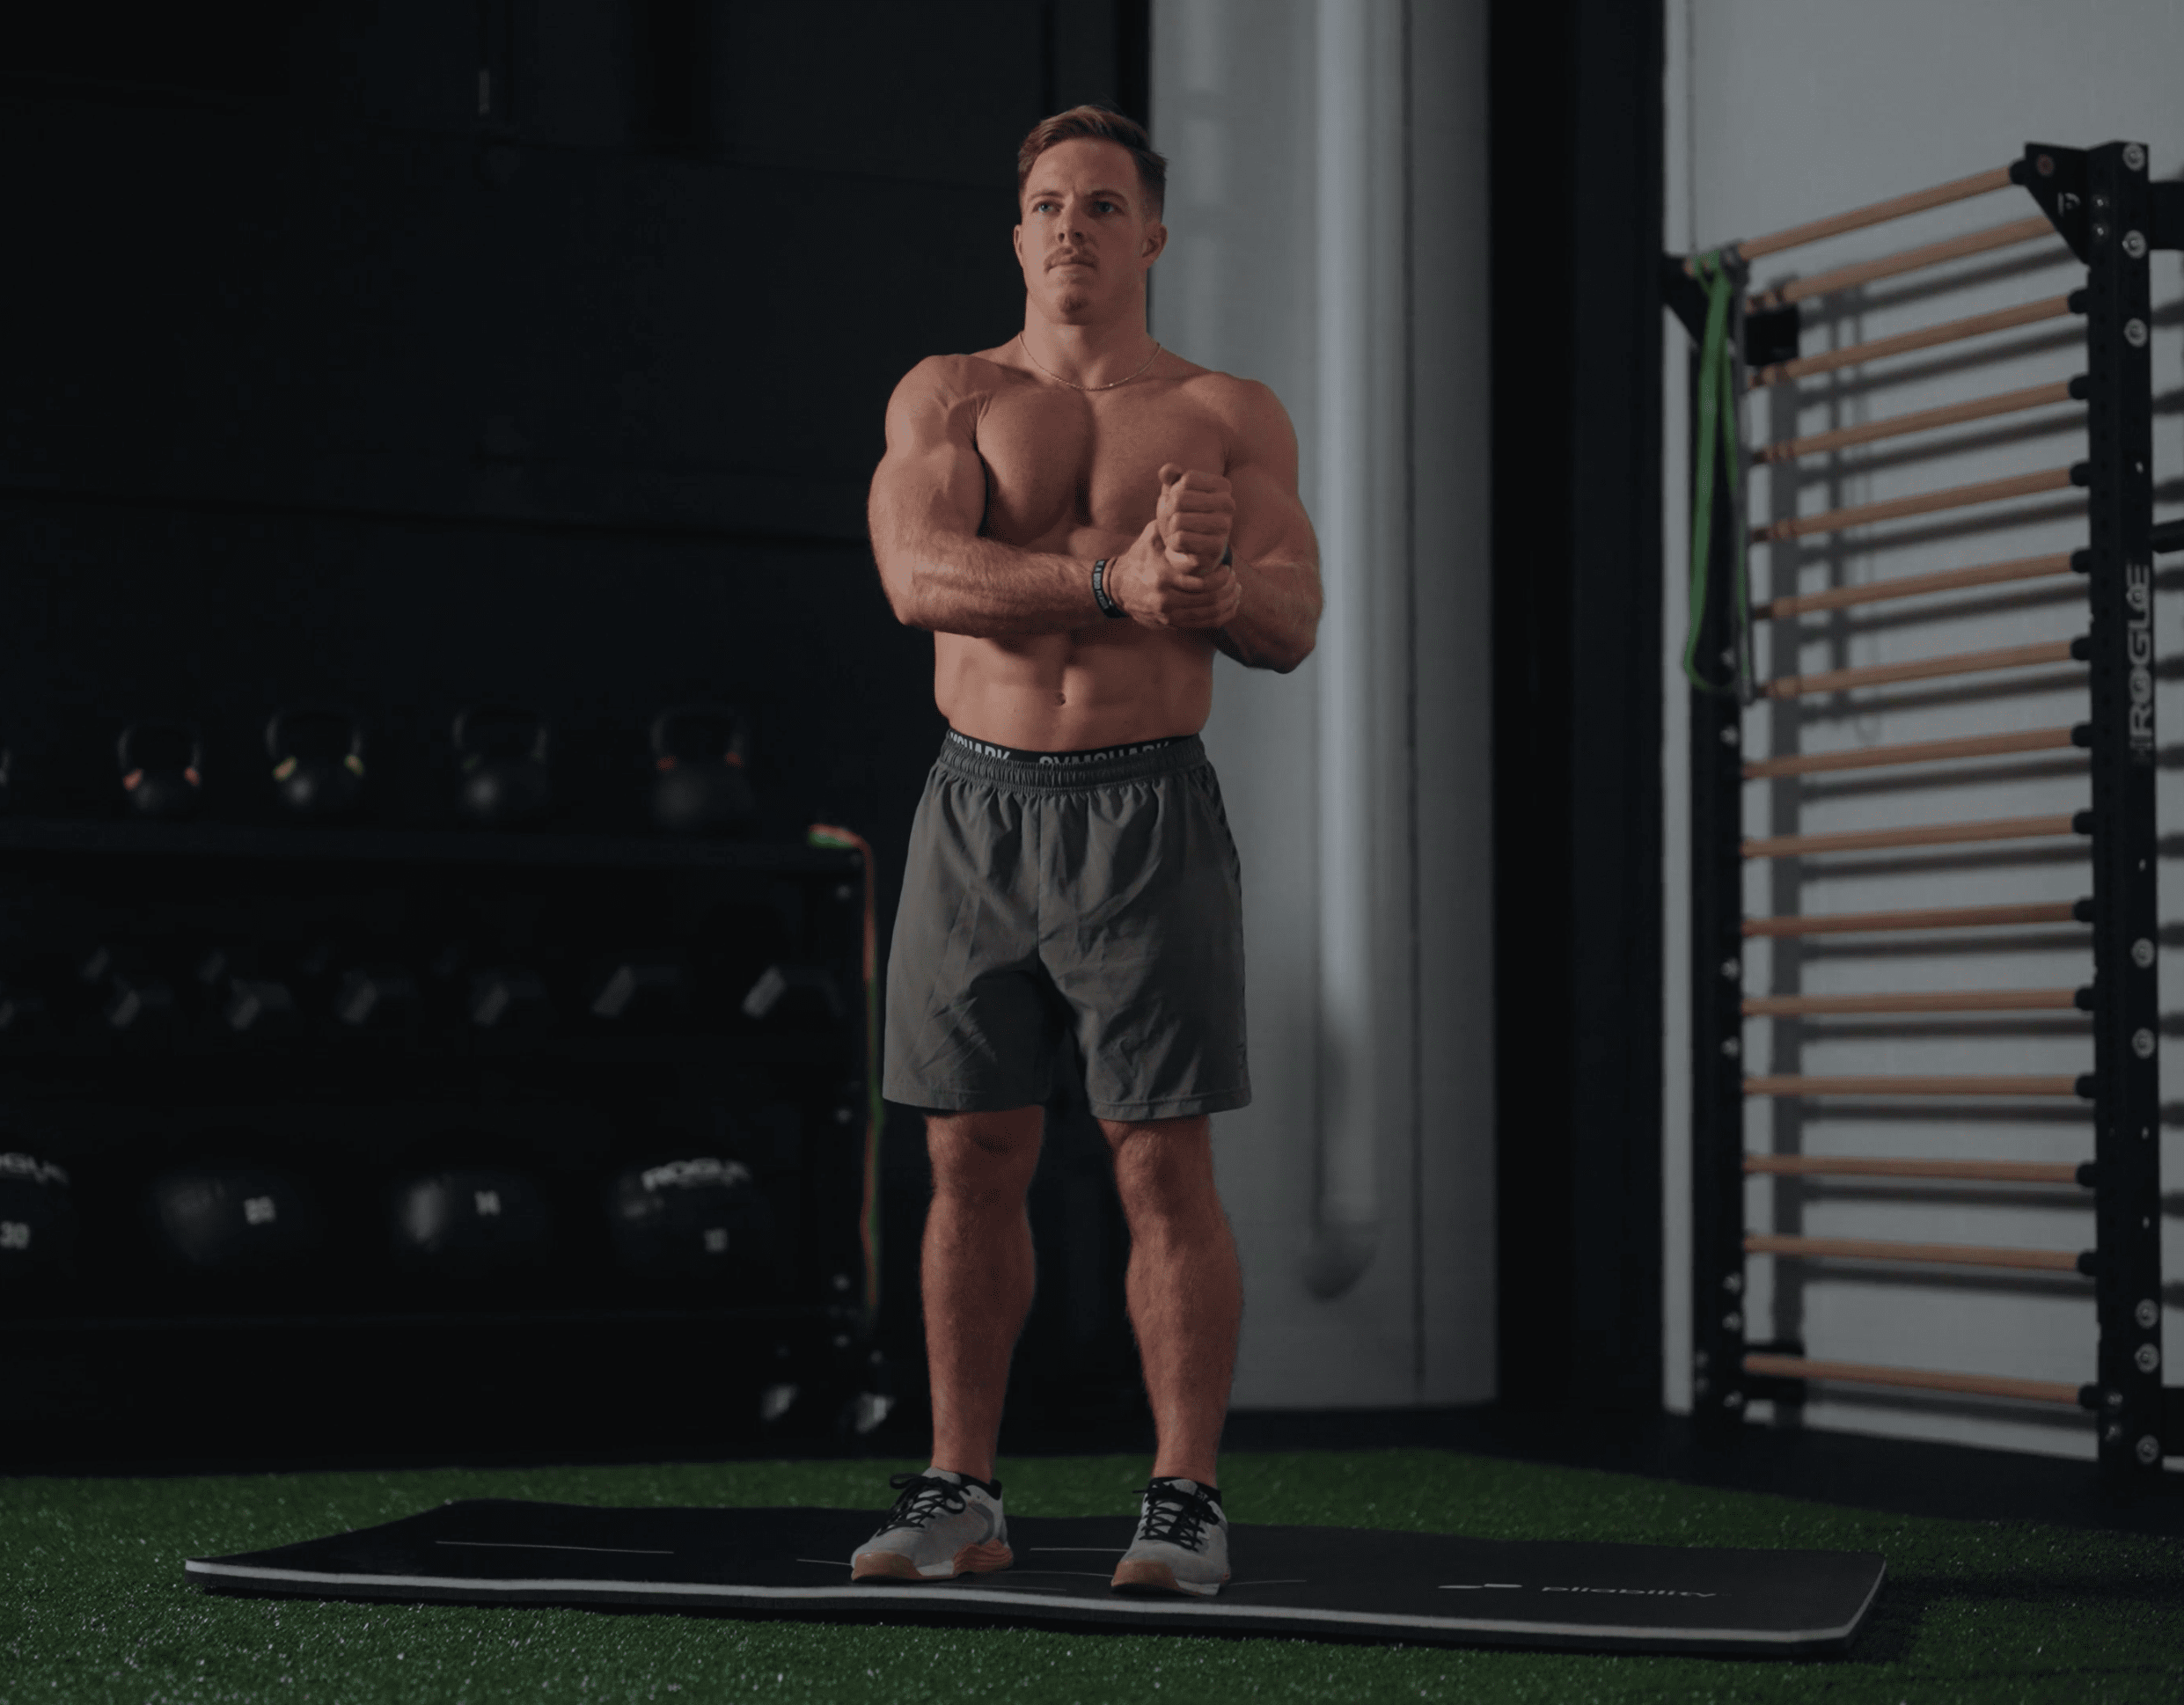
- Stand upright with your arms by your sides then bend your right elbow to 90 degrees.
- With your left hand, grasp your right wrist then try to push your right forearm outwards.
- Continue this for one deep breath, then try to pull your right forearm in towards your body for a second deep breath.
- Try to keep your right forearm still. You should feel muscles around your shoulders working to resist this movement.
- After a few repetitions of each, switch arms.
- Continue this, switching sides at regular intervals, for two minutes.
Why do it?
This exercise is designed to build strength in the active muscles and tissues in and around the shoulder joint, making it more stable.
6. Cervical side flexion PNF
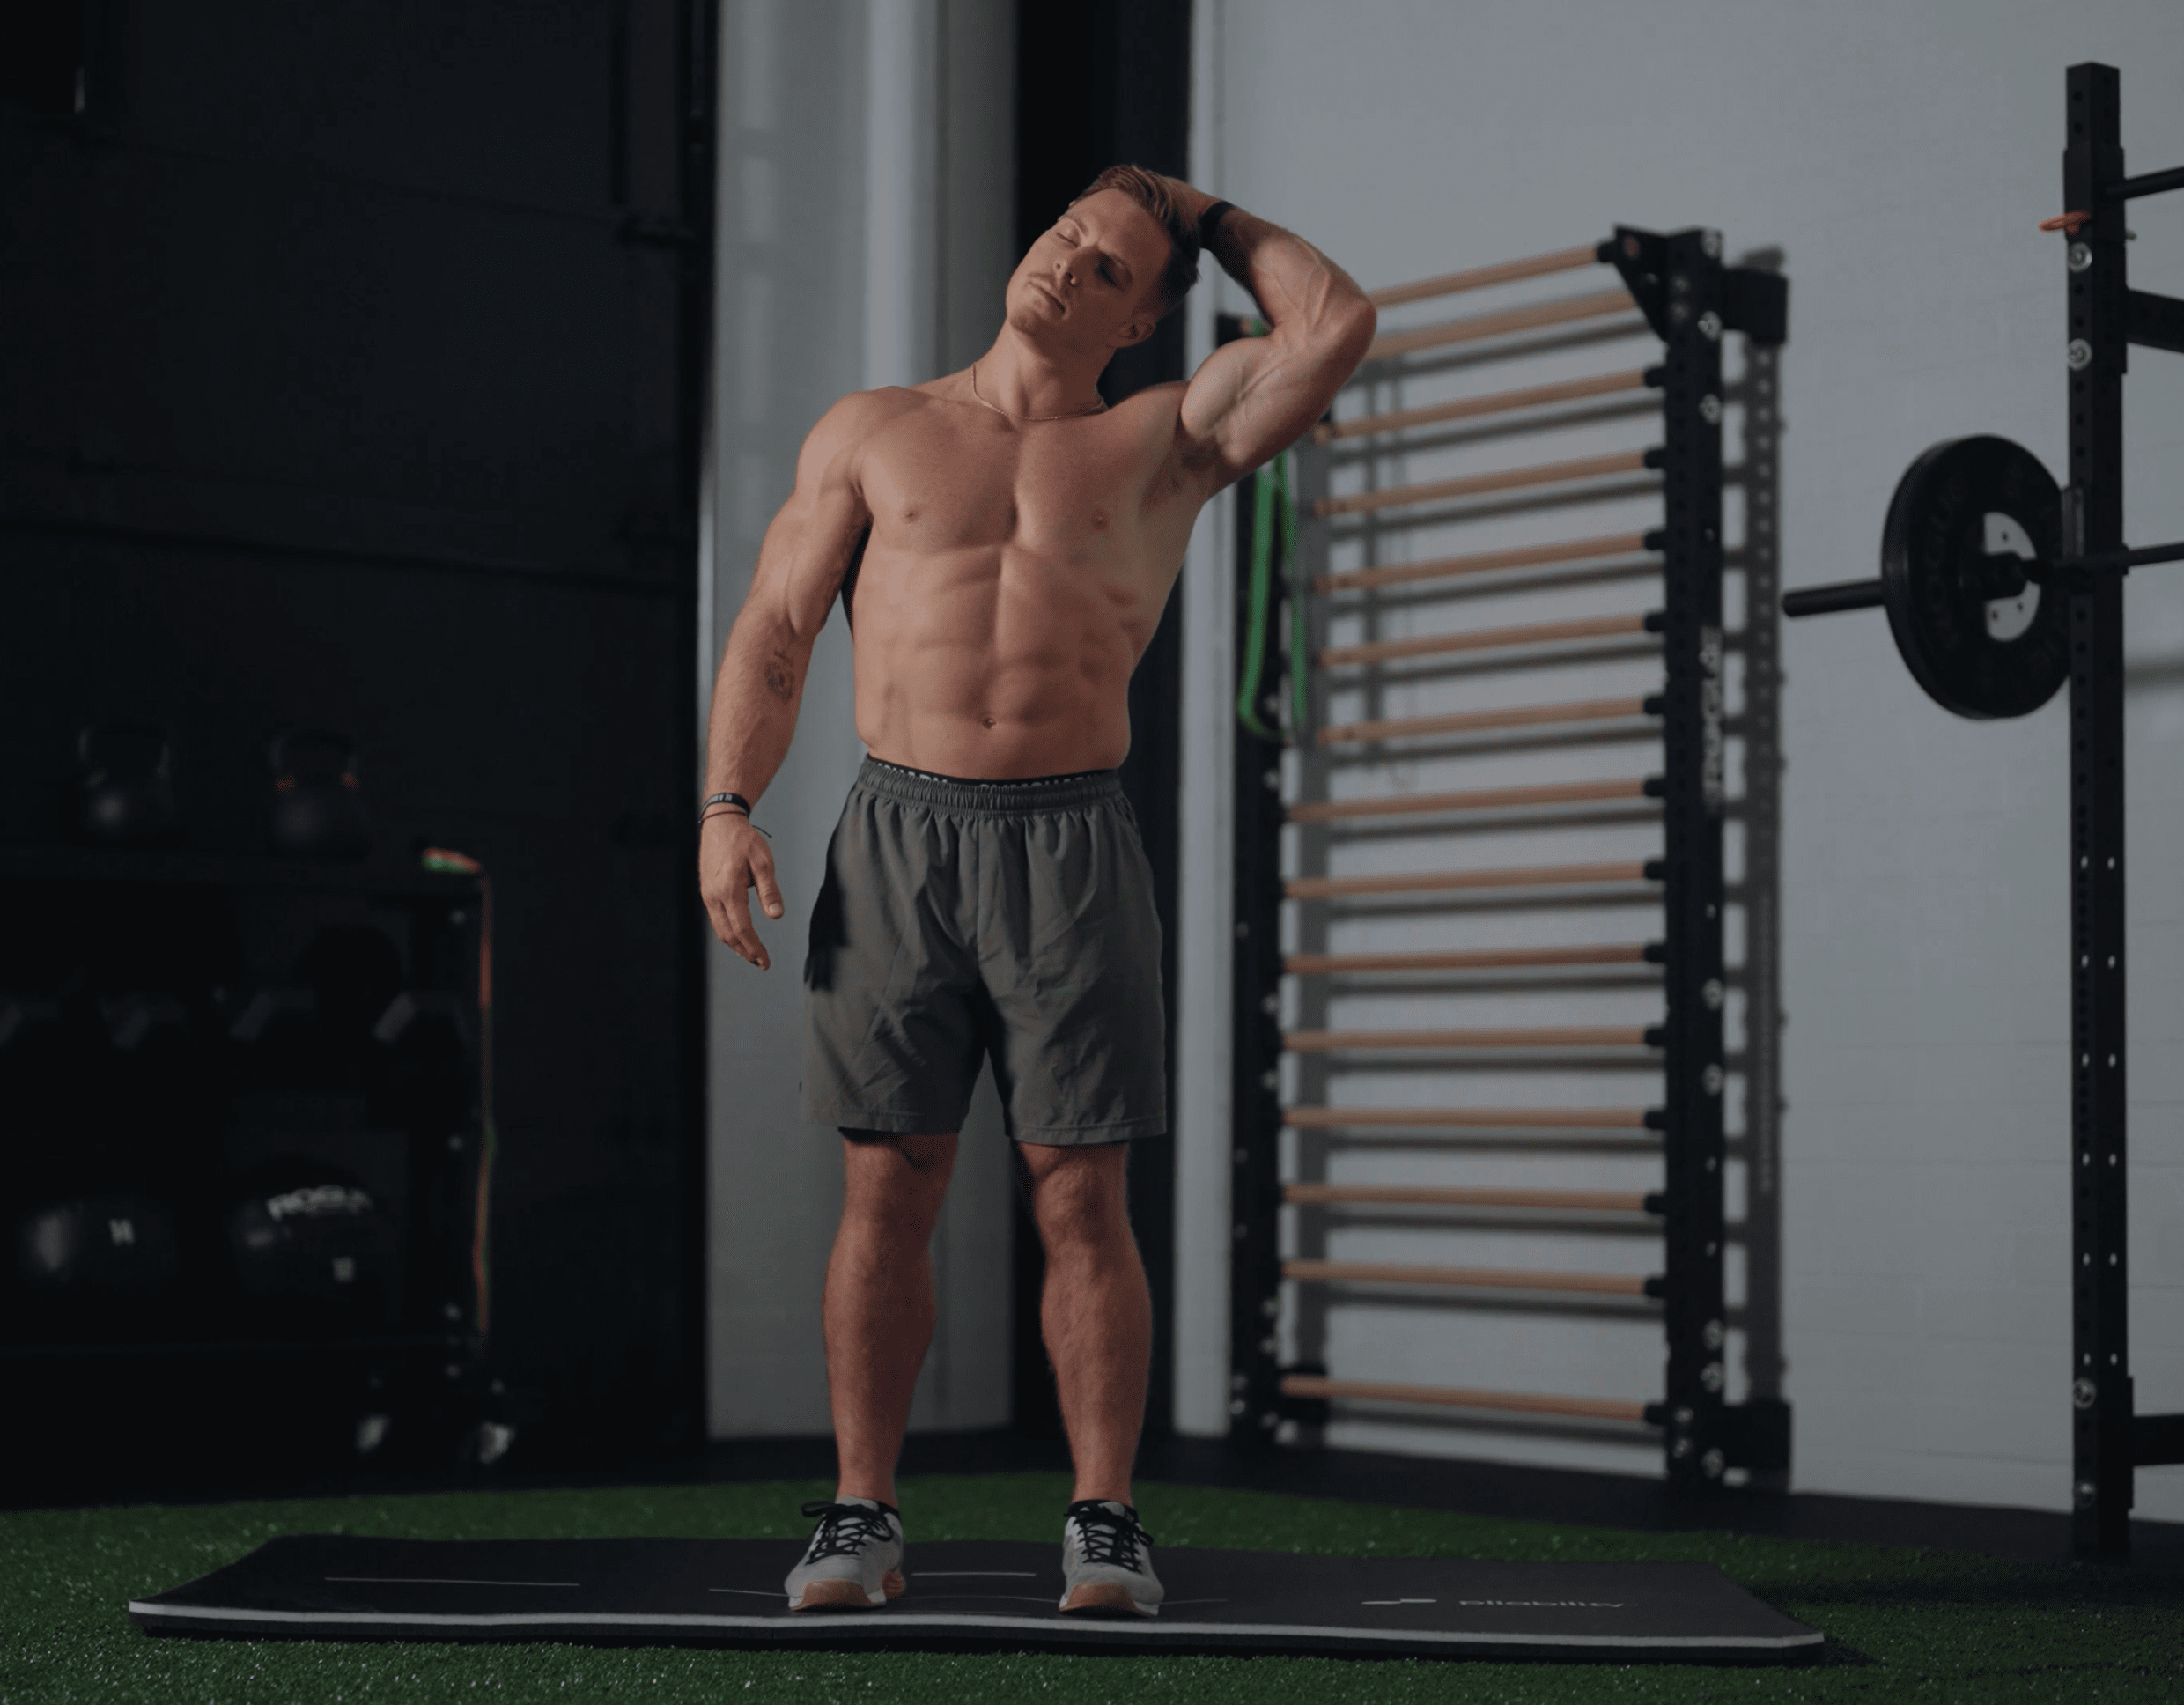
- Stand up straight, then reach your right hand over your head to your left temple and gently pull your right ear to your right shoulder.
- You should feel a stretch down the left side of your neck. When you do, pause, then gently use your neck muscles to push to the left (working against your hand).
- Take a few deep breaths, trying to sink slightly deeper into the stretch during the exhales and relaxing after each one.
- Continue this for one minute, then repeat for another 60 seconds on the other side.
Why do it?
"This pose is designed to improve your overall stability and range of movement," Mooney says. The result? "Increased flexibility through the stimulation of your sensory receptors present in your muscles and around the joints."
What are the benefits?
This routine has been developed by Pliability with help from CrossFit athlete Noah Ohlsen. He says that the upper-body exercises he does regularly can create tension around his shoulders and neck, so he uses these stretches daily as a way to counter this and reduce his risk of injury.
The moves in this routine combine elements of yin yoga (held poses), specific movement flows and stretching, with the aim of "reducing your risk of injury and tightness".
The benefits of yoga are extensive, with research showing various forms of the practice can improve your flexibility, build full-body strength, boost your balance, and even benefit your mind.
So, if you're after a more gentle way to stay active that can help soothe aching limbs, joints and muscles, it could be just the ticket. You don't need to be an expert with hours of classes under your belt either—these yoga stretches for beginners are the perfect place to start.

Harry Bullmore is a Fitness Writer for Fit&Well and its sister site Coach, covering accessible home workouts, strength training session, and yoga routines. He joined the team from Hearst, where he reviewed products for Men's Health, Women's Health, and Runner's World. He is passionate about the physical and mental benefits of exercise, and splits his time between weightlifting, CrossFit, and gymnastics, which he does to build strength, boost his wellbeing, and have fun.
Harry is a NCTJ-qualified journalist, and has written for Vice, Learning Disability Today, and The Argus, where he was a crime, politics, and sports reporter for several UK regional and national newspapers.
-
 Get it before it’s gone! The best Skechers shoe I’ve ever tested is 29% off at Zappos
Deal It’s selling fast, so cash in on this deal while you still can
By Lou Mudge
-
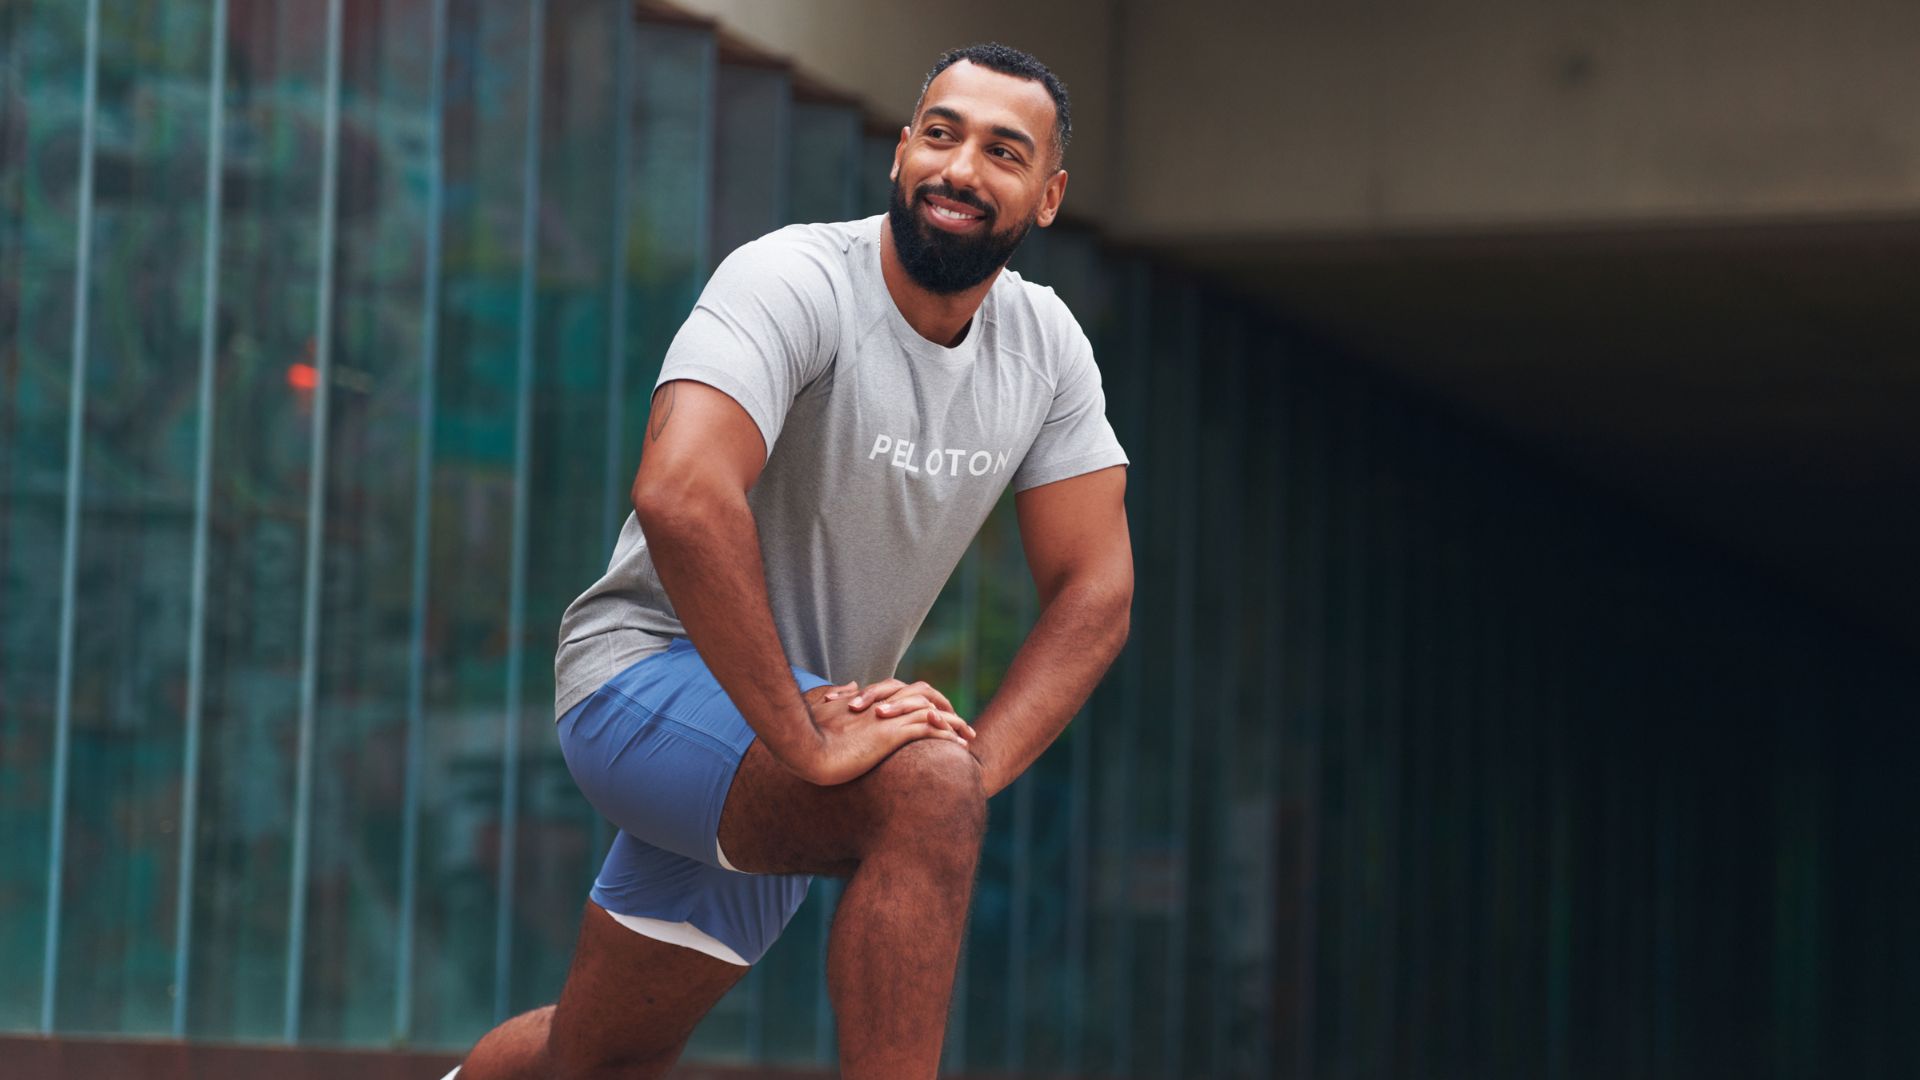 I had hip and knee pain when I ran until I did these two trainer-approved things
Peloton instructor Jermaine Johnson swears by these two things to improve running performance
By Maddy Biddulph